macOS
[![Build]][build_url]
[![Version]][tag_url]
[![Size]][tag_url]
[![Package]][pkg_url]
[![Pulls]][hub_url]
MacOS inside a Docker container.
## Features ✨
- Runs macOS inside a Docker container
- Automatic download and hands-free installation
- Near-native performance with KVM acceleration
- Customizable CPU, memory, and storage allocation
- Hardware-accelerated graphics via [Reims vGPU](https://github.com/steelbrain/reims-vgpu)
- Dynamic memory allocation with memory ballooning
- USB passthrough and host folder sharing
- Supports NAT, user-mode, macvlan, and macvtap networking
## Usage 🐳
##### Docker Compose:
```yaml
services:
macos:
image: dockurr/macos
container_name: macos
environment:
VERSION: "15"
devices:
- /dev/kvm
- /dev/net/tun
cap_add:
- NET_ADMIN
ports:
- 8006:8006
- 5900:5900/tcp
- 5900:5900/udp
volumes:
- ./macos:/storage
restart: always
stop_grace_period: 2m
```
##### Docker CLI:
```bash
docker run -it --rm --name macos -e "VERSION=14" -p 8006:8006 --device=/dev/kvm --device=/dev/net/tun --cap-add NET_ADMIN -v "${PWD:-.}/macos:/storage" --stop-timeout 120 docker.io/dockurr/macos
```
##### Kubernetes:
```shell
kubectl apply -f https://raw.githubusercontent.com/dockur/macos/refs/heads/master/kubernetes.yml
```
##### GitHub Codespaces:
[](https://codespaces.new/dockur/macos)
## Requirements ⚙️
- Docker or Podman on a Linux host with KVM support.
- Docker Desktop or Podman (Desktop) on Windows 11 with nested virtualization enabled.
- An AVX2-capable processor, such as Intel Haswell (4th-generation Core) or AMD Zen (Ryzen 1000 series) or newer.
- At least 4 GB of available RAM.
- At least 32 GB of free disk space.
> [!NOTE]
> Docker Desktop on Linux, macOS, and Windows 10 does not currently provide KVM access to containers and is therefore not supported.
## FAQ 💬
### How do I use it?
Very simple! These are the steps:
- Start the container and connect to [port 8006](http://127.0.0.1:8006/) using your web browser.
- After the recovery image is downloaded, a black screen with a progress bar will appear while macOS downloads the remaining installation files.
- Once the download is complete, the macOS recovery menu will appear.
- Choose `Disk Utility` and then select the largest `Apple Inc. VirtIO Block Media` disk.
- Click the `Erase` button to format the disk to APFS, and give it any name you like.
- Close the current window and proceed the installation by clicking `Reinstall macOS`.
- When prompted where you want to install it, select the disk you created previously.
- After all files are copied, select your region, language, and keyboard settings.
- When the `Migration Assistant` wants to transfer data, select `Not now` (bottom left).
- On the `Apple ID` screen, select `Set Up Later` (bottom left) and then proceed using `Skip`.
- On the `Create a Computer Account` screen, fill in a username and password and `Continue`.
Enjoy your brand new machine, and don't forget to star this repo!
### How do I select the version of macOS?
By default, macOS 15 (Sequoia) will be installed, but you can add the `VERSION` environment variable in order to specify an alternative:
```yaml
environment:
VERSION: "13"
```
Select from the values below:
| **Value** | **Version** | **Name** |
|-------------|----------------|------------------|
| `15` | macOS 15 | Sequoia |
| `14` | macOS 14 | Sonoma |
| `13` | macOS 13 | Ventura |
| `12` | macOS 12 | Monterey |
| `11` | macOS 11 | Big Sur |
> [!NOTE]
> You can also select macOS 26 (Tahoe), but that is not recommended yet, as it runs very slow for some unknown reason.
### How do I change the storage location?
To change the storage location, include the following bind mount in your compose file:
```yaml
volumes:
- ./macos:/storage
```
Replace the example path `./macos` with the desired storage folder or named volume.
### How do I change the size of the disk?
To expand the default size of 64 GB, add the `DISK_SIZE` setting to your compose file and set it to your preferred capacity:
```yaml
environment:
DISK_SIZE: "256G"
```
> [!TIP]
> This can also be used to resize an existing disk to a larger capacity without any data loss.
>
> However, afterwards you will need to run the following two commands from the terminal in macOS:
>
> `diskutil repairDisk disk2`
>
> `diskutil apfs resizeContainer disk3 0`
>
> to allocate this additional space.
### How do I change the amount of CPU or RAM?
By default, macOS will be allowed to use 2 CPU cores and 4 GB of RAM.
If you want to adjust this, you can specify the desired amount using the following environment variables:
```yaml
environment:
RAM_SIZE: "8G"
CPU_CORES: "4"
```
> [!IMPORTANT]
> On AMD systems, do not assign more than 8 GB of RAM during the initial installation process.
### How do I enable audio?
Audio is disabled by default. To stream it to the browser, add the following environment variable:
```yaml
environment:
AUDIO: "Y"
```
Then enable **Audio** under **Settings → Advanced** in the web viewer. The stream is only active while this option is enabled, so it uses no extra bandwidth otherwise.
### How do I enable GPU acceleration?
To enable [Reims vGPU](https://github.com/steelbrain/reims-vgpu) hardware-accelerated graphics using an Intel or AMD GPU, add the following lines to your compose file:
```yaml
environment:
GPU: "Y"
devices:
- /dev/dri
```
For NVIDIA GPUs, the [NVIDIA Container Toolkit](https://docs.nvidia.com/datacenter/cloud-native/container-toolkit/latest/install-guide.html) must be installed on the host and the GPU must be exposed to the container:
```yaml
environment:
GPU: "Y"
NVIDIA_DRIVER_CAPABILITIES: "all"
deploy:
resources:
reservations:
devices:
- driver: nvidia
count: all
capabilities:
- gpu
```
Reims vGPU uses macOS's built-in `AppleParavirtGPU` driver and translates Metal graphics commands to Vulkan on the Linux host, so no additional graphics driver needs to be installed inside macOS.
### How do I share files with the host?
To share files with the host, add the following volume to your compose file:
```yaml
volumes:
- ./example:/shared
```
Then start macOS and execute the following command:
```shell
sudo -S mount_9p shared
```
In Finder’s menu bar, click on “Go – Computer” to access this shared folder, it will show the contents of `./example`.
### How do I assign an individual IP address to the container?
By default, the container uses bridge networking, which shares the IP address with the host.
If you want to assign an individual IP address to the container, you can create a macvlan network as follows:
```bash
docker network create -d macvlan \
--subnet=192.168.0.0/24 \
--gateway=192.168.0.1 \
--ip-range=192.168.0.100/28 \
-o parent=eth0 vlan
```
Be sure to modify these values to match your local subnet.
Once you have created the network, change your compose file to look as follows:
```yaml
services:
macos:
container_name: macos
....
networks:
vlan:
ipv4_address: 192.168.0.100
networks:
vlan:
external: true
```
An added benefit of this approach is that you won't have to perform any port mapping anymore, since all ports will be exposed by default.
> [!IMPORTANT]
> This IP address won't be accessible from the Docker host due to the design of macvlan, which doesn't permit communication between the two. If this is a concern, you need to create a [second macvlan](https://blog.oddbit.com/post/2018-03-12-using-docker-macvlan-networks/#host-access) as a workaround.
### How can macOS acquire an IP address from my router?
After configuring the container for [macvlan](#how-do-i-assign-an-individual-ip-address-to-the-container), it is possible for macOS to become part of your home network by requesting an IP from your router, just like your other devices.
To enable this mode, in which the container and macOS will have separate IP addresses, add the following lines to your compose file:
```yaml
environment:
DHCP: "Y"
devices:
- /dev/vhost-net
device_cgroup_rules:
- 'c *:* rwm'
```
### How do I pass through a disk?
You can pass through disk devices or partitions directly by adding them to your compose file in this way:
```yaml
devices:
- /dev/sdb:/disk1
- /dev/sdc1:/disk2
```
Use `/disk1` if you want it to become your main drive, and use `/disk2` and higher to add them as secondary drives.
### How do I pass through a USB device?
To pass through a USB device, first look up its vendor and product IDs via the `lsusb` command, then add them to your compose file like this:
```yaml
environment:
ARGUMENTS: "-device usb-host,vendorid=0x1234,productid=0x1234"
devices:
- /dev/bus/usb
```
### How do I enable dynamic memory allocation?
By default, the VM is allocated the full amount of RAM configured via `RAM_SIZE` for its entire lifetime.
However, you can enable [memory ballooning](https://github.com/qemus/qemu/blob/master/docs/ballooning.md) if you want the container to dynamically reclaim unused guest RAM based on host memory pressure.
### Are these all available options?
No. For a complete overview of all supported settings, see the [environment variables](docs/environment.md) page.
### How do I verify that KVM is available?
First, make sure your platform and container runtime meet the [requirements](#requirements-️) listed above.
On a Linux host, install `cpu-checker` and run:
```bash
sudo apt install cpu-checker
sudo kvm-ok
```
A working configuration should report:
```text
KVM acceleration can be used
```
You can also verify that the KVM device exists:
```bash
ls -l /dev/kvm
```
If KVM is unavailable, check whether:
- Hardware virtualization (`Intel VT-x` or `AMD-V`) is enabled in your BIOS or UEFI.
- Nested virtualization is enabled when the host itself is a virtual machine.
- Your VPS or cloud provider supports nested virtualization.
If `kvm-ok` succeeds but the container still reports that KVM is unavailable, you can temporarily add `privileged: true` to your Compose file to rule out a permission or device-access issue.
### How do I run Windows in a container?
You can use [dockur/windows](https://github.com/dockur/windows) for that. It shares many of the same features, and even has completely automatic installation.
### How do I run a Linux desktop in a container?
You can use [qemus/qemu](https://github.com/qemus/qemu) in that case.
### Is this project legal?
Yes, this project contains only open-source code and does not distribute macOS itself. Neither does it try to circumvent any copyright protection measures.
However, by installing Apple's macOS, you must accept their end-user license agreement, which does not permit installation on non-official hardware. So only run this container on hardware sold by Apple, as any other use will be a violation of their terms and conditions.
## Acknowledgements 🙏
Special thanks to [seitenca](https://github.com/seitenca), this project would not exist without her invaluable work.
## Stars 🌟
[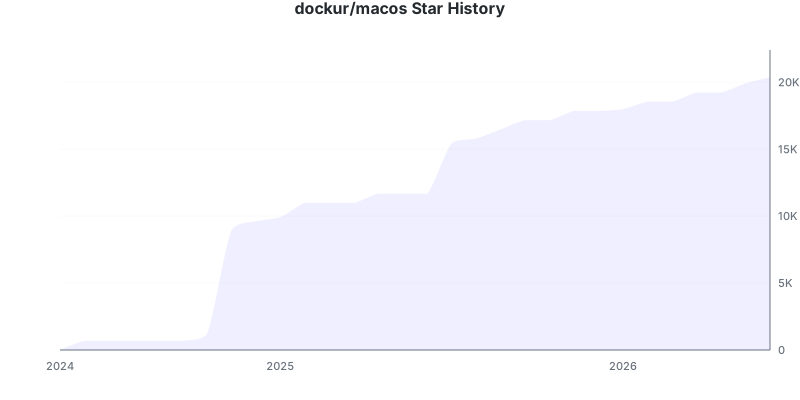](https://github.com/dockur/macos/stargazers)
## Disclaimer ⚖️
*Only run this container on Apple hardware, any other use is not permitted by their EULA. The product names, logos, brands, and other trademarks referred to within this project are the property of their respective trademark holders. This project is not affiliated, sponsored, or endorsed by Apple Inc.*
[build_url]: https://github.com/dockur/macos/
[hub_url]: https://hub.docker.com/r/dockurr/macos/
[tag_url]: https://hub.docker.com/r/dockurr/macos/tags
[pkg_url]: https://github.com/dockur/macos/pkgs/container/macos
[Build]: https://github.com/dockur/macos/actions/workflows/build.yml/badge.svg
[Size]: https://img.shields.io/docker/image-size/dockurr/macos/latest?color=066da5&label=size
[Pulls]: https://img.shields.io/docker/pulls/dockurr/macos.svg?style=flat&label=pulls&logo=docker
[Version]: https://img.shields.io/docker/v/dockurr/macos/latest?arch=amd64&sort=semver&color=066da5
[Package]: https://img.shields.io/badge/dynamic/json?url=https%3A%2F%2Fipitio.github.io%2Fbackage%2Fdockur%2Fmacos%2Fmacos.json&query=%24.downloads&logo=github&style=flat&color=066da5&label=pulls
