---
title: How to set up surveys in Angular
date: 2024-01-24
author:
- lior-neu-ner
showTitle: true
sidebar: Docs
featuredVideo: https://www.youtube-nocookie.com/embed/KSzLc80FIx4
featuredImage: >-
https://res.cloudinary.com/dmukukwp6/image/upload/posthog.com/contents/images/tutorials/banners/tutorial-12.png
tags:
- surveys
---
import { ProductScreenshot } from 'components/ProductScreenshot'
export const EventsLight = "https://res.cloudinary.com/dmukukwp6/image/upload/posthog.com/contents/images/tutorials/angular-surveys/events-light.png"
export const EventsDark = "https://res.cloudinary.com/dmukukwp6/image/upload/posthog.com/contents/images/tutorials/angular-surveys/events-dark.png"
export const ImgSurveyResultsLight = "https://res.cloudinary.com/dmukukwp6/image/upload/posthog.com/contents/images/tutorials/angular-surveys/survey-results-light.png"
export const ImgSurveyResultsDark = "https://res.cloudinary.com/dmukukwp6/image/upload/posthog.com/contents/images/tutorials/angular-surveys/survey-results-dark.png"
export const ImgSurveyTemplatesLight = "https://res.cloudinary.com/dmukukwp6/image/upload/posthog.com/contents/images/tutorials/angular-surveys/survey-templates-light.png"
export const ImgSurveyTemplatesDark = "https://res.cloudinary.com/dmukukwp6/image/upload/posthog.com/contents/images/tutorials/angular-surveys/survey-templates-dark.png"
[Surveys](/docs/surveys) are a great way to get feedback from your users. In this guide, we show you how to add a survey to your Angular app.
We'll create a basic Angular app, add PostHog, create a survey, and then show you how to display the survey in the app and get responses.
## 1. Create an Angular app
First, ensure [Node.js is installed](https://nodejs.dev/en/learn/how-to-install-nodejs/) (version 14.20.0 or newer). Then, install the Angular CLI and create a new Angular app:
```bash
npm install -g @angular/cli
ng new angular-surveys
```
Select `CSS` as your stylesheet and `No` for server side rendering and static site generation.
Next, Replace the code in `src/app/app.component.html` with a simple heading:
```html file=app.component.html
Angular Surveys
```
Run `ng serve` and navigate to `http://localhost:4200` to see your app in action.
## 2. Add PostHog
We use PostHog to create and control our survey as well as monitor results. If you don't have a PostHog instance, you can [sign up for free here](https://us.posthog.com/signup).
To start, install the [JavaScript web SDK](/docs/libraries/js):
```bash
npm i posthog-js
```
In `src/main.ts`, initialize PostHog using your project API key and instance address. You can get both in your [project settings](https://us.posthog.com/project/settings).
```ts file=main.ts
import { bootstrapApplication } from '@angular/platform-browser';
import { appConfig } from './app/app.config';
import { AppComponent } from './app/app.component';
import posthog from 'posthog-js'
posthog.init('', {
api_host:'',
defaults: ''
})
bootstrapApplication(AppComponent, appConfig)
.catch((err) => console.error(err));
```
Once you’ve done this, reload your app. You should see events appearing in the [PostHog events explorer](https://us.posthog.com/events).
## 3. Create a survey
There are two options for displaying a survey using PostHog:
1. Use PostHog's prebuilt survey UI.
2. Implement your own survey UI.
This tutorial will cover how to implement both options:
### Option 1: Use PostHog's prebuilt survey UI
This is the simplest option. PostHog has a variety of [survey templates](/templates?filter=type&value=survey) to choose from, handles all the display logic, and captures responses for you. You can also customize the questions, branding, and display conditions as needed – see our [survey docs](/docs/surveys/creating-surveys) for more details on how to do so.
To create a survey with a prebuilt UI, go to the [surveys tab](https://us.posthog.com/surveys) in PostHog and click "New survey".
Select any template, or you can create your own by clicking "Create blank survey". Then, configure your survey with the following details:
1. Ensure `Presentation` is set to **Popover**.
2. Set the display conditions to `All users`.
3. Use the default values for everything else.
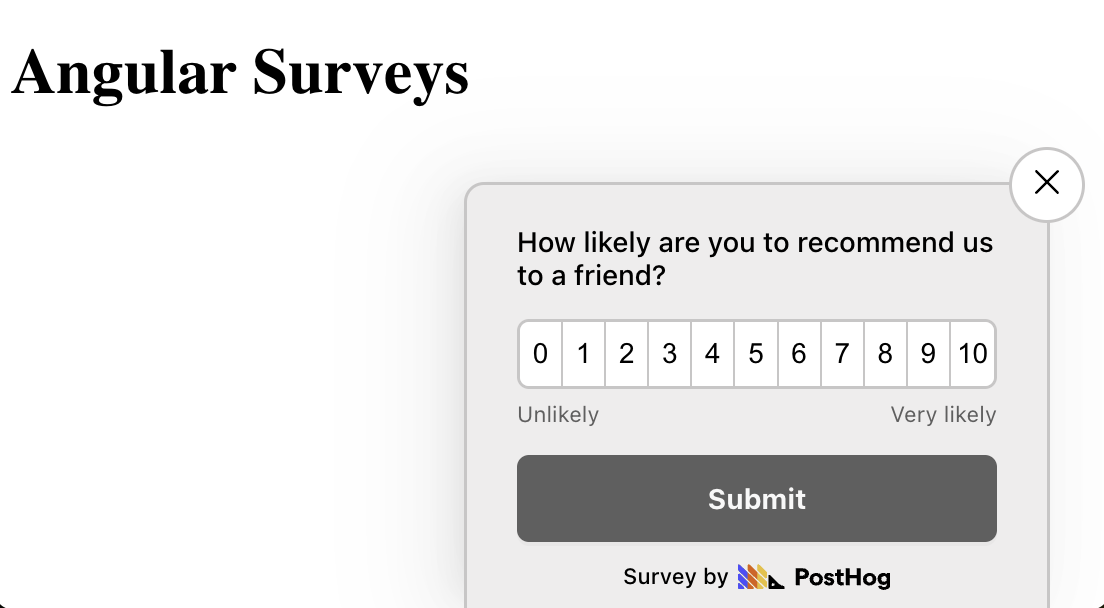
Then, click "Save as draft" and then "Launch". Your survey is now live and you should see it in your app. After submitting responses, you can [view results in PostHog](#4-view-results).
### Option 2: Implement your own survey UI
If you prefer to have complete control of your survey UI and logic, you can still use PostHog to keep track of and analyze your results.
First, create a survey in PostHog like in option 1 above (for this tutorial, we use a Net Promoter Score survey template). The only difference is you must set `Presentation` to **API**.
Then, there are four parts to adding code for our custom survey:
1. Create the survey UI.
2. Fetch the survey from PostHog.
3. Add the logic for displaying and hiding it.
4. Capture interactions from it.
#### 1. Create the survey UI
We've created a sample survey UI for this tutorial. To use it, first generate a new component using the Angular CLI:
```bash
# In your base directory
ng generate component components/custom-survey
```
This creates a new component in the `src/app/components/custom-survey` directory. You'll have four files: `custom-survey.component.ts`, `custom-survey.component.html`, `custom-survey.component.css`, and `custom-survey.component.spec.ts`. You need to replace the code in three of them.
First, in `custom-survey.component.html`:
```html file=custom-survey.component.html
{{ title }}
```
Second, in `custom-survey.component.ts`:
```typescript file=custom-survey.component.ts
import { Component, EventEmitter, Input, Output } from '@angular/core';
import { CommonModule } from '@angular/common';
@Component({
selector: 'app-custom-survey',
standalone: true,
imports: [CommonModule],
templateUrl: './custom-survey.component.html',
styleUrls: ['./custom-survey.component.css']
})
export class CustomSurveyComponent {
@Input() title!: string;
@Output() onDismiss = new EventEmitter();
@Output() onSubmit = new EventEmitter();
selectedValue: number | undefined = undefined;
numbers = Array.from({ length: 10 }, (_, i) => i + 1);
handleSelect(value: number) {
this.selectedValue = value;
}
emitDismiss() {
this.onDismiss.emit();
}
emitSubmit() {
this.onSubmit.emit(this.selectedValue);
}
}
```
Third, in `custom-survey.component.css`:
```css file=custom-survey.component.css
.survey {
position: fixed;
bottom: 20px;
right: 20px;
width: 400px;
padding: 20px;
background-color: #ffffff;
box-shadow: 0px 0px 10px rgba(0, 0, 0, 0.2);
border-radius: 5px;
z-index: 1000;
}
.button {
margin: 5px;
padding: 5px;
}
```
Now we integrate our new `CustomSurveyComponent` into our `AppComponent`. First, `` to `app.component.html`:
```html file=app.component.html
Angular Surveys
```
Then, in `app.component.ts`, import `CustomSurveyComponent` and define the methods:
```typescript file=app.component.ts
import { Component } from '@angular/core';
import { RouterOutlet } from '@angular/router';
import { CommonModule } from '@angular/common';
import { CustomSurveyComponent } from './components/custom-survey/custom-survey.component';
@Component({
selector: 'app-root',
standalone: true,
imports: [RouterOutlet, CustomSurveyComponent, CommonModule],
templateUrl: './app.component.html',
styleUrls: ['./app.component.css']
})
export class AppComponent {
title = 'angular-surveys';
surveyTitle = 'Survey title';
showSurvey = true;
handleDismiss() {
this.showSurvey = false;
}
handleSubmit(value: number) {
console.log("Submitted value:", value);
this.showSurvey = false;
}
}
```
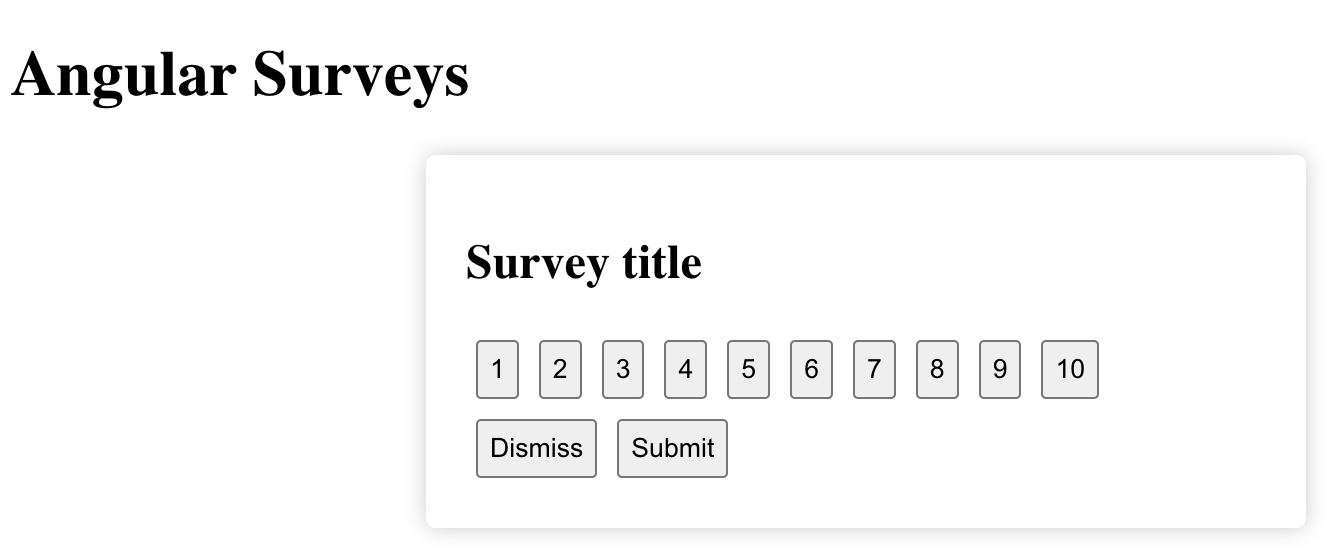
This shows a survey popup every time you visit your app's homepage.
#### 2. Fetch the survey from PostHog
PostHog keeps track of all active surveys for a user (this is especially helpful if you set up [custom display conditions](/docs/surveys/creating-surveys#display-conditions)).
To fetch the active surveys, we use `posthog.getActiveMatchingSurveys()`. This returns an array of survey objects that looks like this:
```JSON
[
{
"id": "018cfcd5-107e-0000-49a1-8e7c6b825947",
"name": "Net promoter score (NPS) API Survey",
"description": "",
"type": "api",
"linked_flag_key": null,
"targeting_flag_key": null,
"questions": [
{
"type": "rating",
"scale": 10,
"display": "number",
"question": "How likely are you to recommend us to a friend?",
"description": "",
"lowerBoundLabel": "Unlikely",
"upperBoundLabel": "Very likely"
}
],
"conditions": null,
"start_date": "2024-01-12T08:41:20.614000Z",
"end_date": null
}
]
```
To fetch this array and integrate it with your survey UI, update your code in `app.component.ts`:
```typescript file=app.component.ts
// Import OnInit and ChangeDetectorRef
import { Component, OnInit, ChangeDetectorRef } from '@angular/core';
import { RouterOutlet } from '@angular/router';
import { CommonModule } from '@angular/common';
import { CustomSurveyComponent } from './components/custom-survey/custom-survey.component';
import posthog from 'posthog-js'
@Component({
// your existing config
})
export class AppComponent implements OnInit {
title = 'angular-surveys';
surveyTitle = 'Survey title';
showSurvey = true;
surveyID = '';
constructor(private changeDetector: ChangeDetectorRef) {}
ngOnInit(): void {
this.fetchActiveSurveys();
}
private fetchActiveSurveys(): void {
posthog.getActiveMatchingSurveys((surveys) => {
if (surveys.length > 0) {
const survey = surveys[0];
this.surveyID = survey.id;
this.surveyTitle = survey.questions[0].question;
this.changeDetector.detectChanges();
}
});
}
handleDismiss(): void {
// existing code
}
handleSubmit(value: number): void {
// existing code
}
}
```
#### 3. Add the logic for displaying and hiding it.
We want to make sure we don't show the survey again to users who have either submitted or dismissed it. We use [`localStorage`](https://developer.mozilla.org/en-US/docs/Web/API/Window/localStorage) to store this data and use it to check whether to show the survey or not.
```typescript file=app.component.ts
// rest of your imports and code
export class AppComponent {
title = 'angular-surveys';
showSurvey = false; // updated to false
// rest of code
private fetchActiveSurveys(): void {
posthog.getActiveMatchingSurveys((surveys) => {
if (surveys.length > 0) {
const survey = surveys[0];
this.surveyID = survey.id;
this.surveyTitle = survey.questions[0].question;
this.checkSurveyInteraction();
this.changeDetector.detectChanges();
}
});
}
private checkSurveyInteraction(): void {
const hasInteractedWithSurvey = localStorage.getItem(`hasInteractedWithSurvey_${this.surveyID}`);
this.showSurvey = !hasInteractedWithSurvey;
this.changeDetector.detectChanges();
}
handleDismiss(): void {
this.showSurvey = false;
localStorage.setItem(`hasInteractedWithSurvey_${this.surveyID}`, 'true');
}
handleSubmit(value: number): void {
console.log("Submitted value:", value);
this.showSurvey = false;
localStorage.setItem(`hasInteractedWithSurvey_${this.surveyID}`, 'true');
}
}
```
#### 4. Capture interactions from it.
The final step in setting up our survey is capturing interactions. This enables us to analyze the results in PostHog.
There are 3 events to capture:
1. `"survey shown"`
2. `"survey dismissed"`
3. `"survey sent"` (for responses)
You can capture these events using `this.$posthog.capture()`:
```typescript file=app.component.ts
// rest of your imports and code
export class AppComponent {
// rest of your code
private checkSurveyInteraction(): void {
const hasInteractedWithSurvey = localStorage.getItem(`hasInteractedWithSurvey_${this.surveyID}`);
this.showSurvey = !hasInteractedWithSurvey;
this.changeDetector.detectChanges();
if (this.showSurvey) {
posthog.capture("survey shown", {
$survey_id: this.surveyID // required
})
}
}
handleDismiss(): void {
this.showSurvey = false;
localStorage.setItem(`hasInteractedWithSurvey_${this.surveyID}`, 'true');
posthog.capture("survey dismissed", {
$survey_id: this.surveyID // required
})
}
handleSubmit(value: number): void {
console.log("Submitted value:", value);
this.showSurvey = false;
localStorage.setItem(`hasInteractedWithSurvey_${this.surveyID}`, 'true');
posthog.capture("survey sent", {
$survey_id: this.surveyID, // required
$survey_response_a3071551-d599-4eeb-9ffe-69e93dc647b6: `${value}` // required. Convert numbers to string
$survey_questions: [
{
id: "a3071551-d599-4eeb-9ffe-69e93dc647b6",
question: "How likely are you to recommend us to a friend?",
}
] // required for `getSurveyResponse` to work as expected
})
}
}
```
Altogether, your `app.component.ts` should look like this:
```typescript file=app.component.ts
import { Component, ChangeDetectorRef } from '@angular/core';
import posthog from 'posthog-js'
import { CommonModule } from '@angular/common';
import { RouterOutlet } from '@angular/router';
import { CustomSurveyComponent } from './components/custom-survey/custom-survey.component';
@Component({
selector: 'app-root',
standalone: true,
imports: [RouterOutlet, CustomSurveyComponent, CommonModule],
templateUrl: './app.component.html',
styleUrls: ['./app.component.css']
})
export class AppComponent {
title = 'angular-surveys';
showSurvey = false;
surveyTitle = '';
surveyID = '';
constructor(private changeDetector: ChangeDetectorRef) {}
ngOnInit(): void {
this.fetchActiveSurveys();
}
private fetchActiveSurveys(): void {
posthog.getActiveMatchingSurveys((surveys) => {
console.log(surveys)
if (surveys.length > 0) {
const survey = surveys[0];
this.surveyID = survey.id;
this.surveyTitle = survey.questions[0].question;
this.checkSurveyInteraction();
this.changeDetector.detectChanges();
}
});
}
private checkSurveyInteraction(): void {
const hasInteractedWithSurvey = localStorage.getItem(`hasInteractedWithSurvey_${this.surveyID}`);
this.showSurvey = !hasInteractedWithSurvey;
this.changeDetector.detectChanges();
if (this.showSurvey) {
posthog.capture("survey shown", {
$survey_id: this.surveyID // required
})
}
}
handleDismiss(): void {
this.showSurvey = false;
localStorage.setItem(`hasInteractedWithSurvey_${this.surveyID}`, 'true');
posthog.capture("survey dismissed", {
$survey_id: this.surveyID // required
})
}
handleSubmit(value: number): void {
console.log("Submitted value:", value);
this.showSurvey = false;
localStorage.setItem(`hasInteractedWithSurvey_${this.surveyID}`, 'true');
posthog.capture("survey sent", {
$survey_id: this.surveyID, // required
$survey_response_a3071551-d599-4eeb-9ffe-69e93dc647b6: `${value}` // required. Convert numbers to string
$survey_questions: [
{
id: "a3071551-d599-4eeb-9ffe-69e93dc647b6",
question: "How likely are you to recommend us to a friend?",
}
] // required for `getSurveyResponse` to work as expected
})
}
}
```
Our survey is now ready to go! The next step is to ship the changes, get responses, and view your results.
## 4. View results
After interacting with your survey, you can view results by selecting the survey from the [surveys tab](https://us.posthog.com/surveys). You'll see data on:
- How many users have seen the survey.
- How many users have dismissed the survey.
- Responses.
If you capture identified events, you can also filter these results based on [person properties](/docs/product-analytics/person-properties), [cohorts](/docs/data/cohorts), [feature flags](/docs/feature-flags/creating-feature-flags) and more.
## Further reading
- [How to set up A/B tests in Angular](/tutorials/angular-ab-tests)
- [How to set up Angular analytics, feature flags, and more](/tutorials/angular-analytics)
- [How to analyze surveys with ChatGPT](/tutorials/analyze-surveys-with-chatgpt)