---
title: 'How to set up Bubble analytics, session replays, and more'
date: 2024-01-10
author:
- lior-neu-ner
showTitle: true
featuredVideo: https://www.youtube-nocookie.com/embed/bGCraI7BSqU
sidebar: Docs
tags:
- session replay
- feature flags
- product analytics
---
import { ProductScreenshot } from 'components/ProductScreenshot'
export const ImgAutocaptureLight = "https://res.cloudinary.com/dmukukwp6/image/upload/posthog.com/contents/images/tutorials/bubble-analytics/autocapture-light.png"
export const ImgAutocaptureDark = "https://res.cloudinary.com/dmukukwp6/image/upload/posthog.com/contents/images/tutorials/bubble-analytics/autocapture-dark.png"
[Bubble](https://bubble.io/) is a popular no-code site builder that makes it easy to design a high-quality websites and apps. Combined with tools like [analytics](/product-analytics), [session replays](/session-replay), and [feature flags](/feature-flags), you can build the best site possible.
This tutorial shows you how to set up PostHog on your Bubble site for capturing events, session replays, and implementing feature flags.
## How to add PostHog to your Bubble site
First, [sign up to PostHog](https://us.posthog.com/signup). Then, go to your [project settings](https://us.posthog.com/settings/project) and copy your [web snippet](https://us.posthog.com/settings/project-details#snippet). It looks like this:
```js
```
With the snippet copied, go to your Bubble site settings by clicking on the icon in the left-hand menu. If you haven’t already, sign up for at least the **Starter** site plan. This enables you to add custom code.
Go to the **SEO / metatags** tab in site settings. Paste your PostHog snippet in the **Script/meta tags in header** section. Then, deploy your site to live.

PostHog will now begin [automatically capturing](/docs/product-analytics/autocapture) events like pageviews, button clicks, and form inputs on your site.
## How to capture custom events
To capture custom events, we create a [Bubble action](https://manual.bubble.io/help-guides/logic/workflows/actions) to run JavaScript code.
To do so, you first need to install the [Toolbox plugin](https://bubble.io/plugin/toolbox-1488796042609x768734193128308700). Once installed, create a new action by going to the [Workflow tab](https://manual.bubble.io/help-guides/getting-started/navigating-the-bubble-editor/tabs-and-sections/workflow-tab) in Bubble and selecting an event. Then click on **add an action**.
In the menu that appears, click on **Plugins** and then **Run javascript**. This will open a new menu where you can add custom JavaScript code.

To capture PostHog events, add the following code under the **Script** heading:
```js
window.posthog.capture("your_event_name")
```
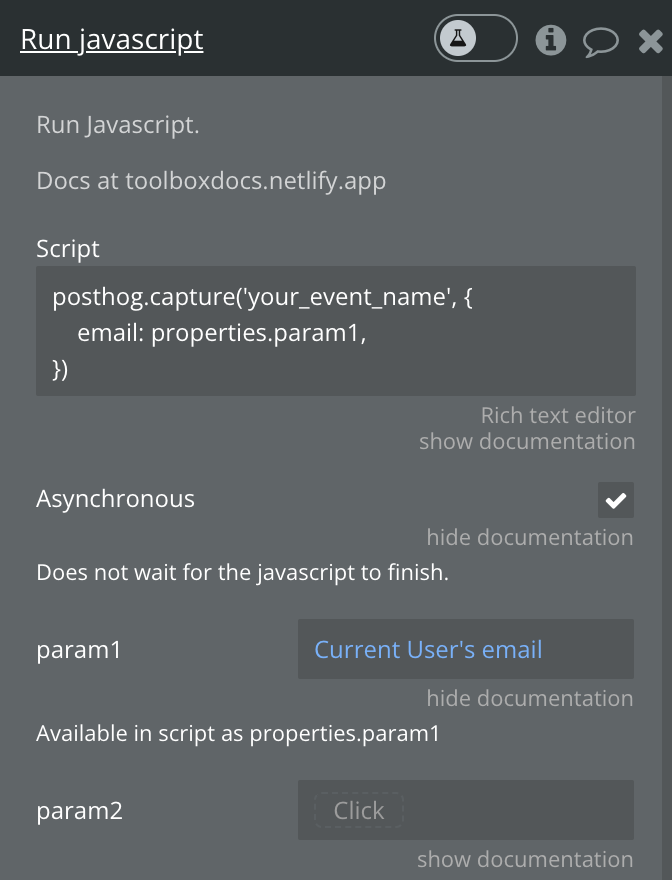
Optionally, you can also include additional information in the event by including parameters as properties:
```js
posthog.capture('your_event_name', {
email: properties.param1,
})
```
where `param1` is set in the "Run javascript" menu:
Finally, deploy your changes to live to begin capturing your custom event.
## How to enable session replays
[Session replays](/docs/session-replay) enable you to record and playback user interactions on your site.
To enable it, go the [Session replay tab](https://us.posthog.com/replay) in PostHog. Then, click on the **Configure** button in the top right and toggle on **Record user sessions** in the menu that opens up.
Once enabled, user sessions will begin to appear in the [Recent recordings tab](https://us.posthog.com/replay).

## Customizing components with feature flags
[Feature flags](/docs/feature-flags) are useful for conditionally showing (or hiding) components based on a rollout percentage and properties. For example, you can use a flag to show or hide a button.
To do this, go to the [feature flags tab](https://us.posthog.com/feature_flags) in PostHog. Click **New feature flag**, enter a key name (for example, `show-signup-button`), fill out the details, set release conditions to roll out to 100% of users, and click **Save**.
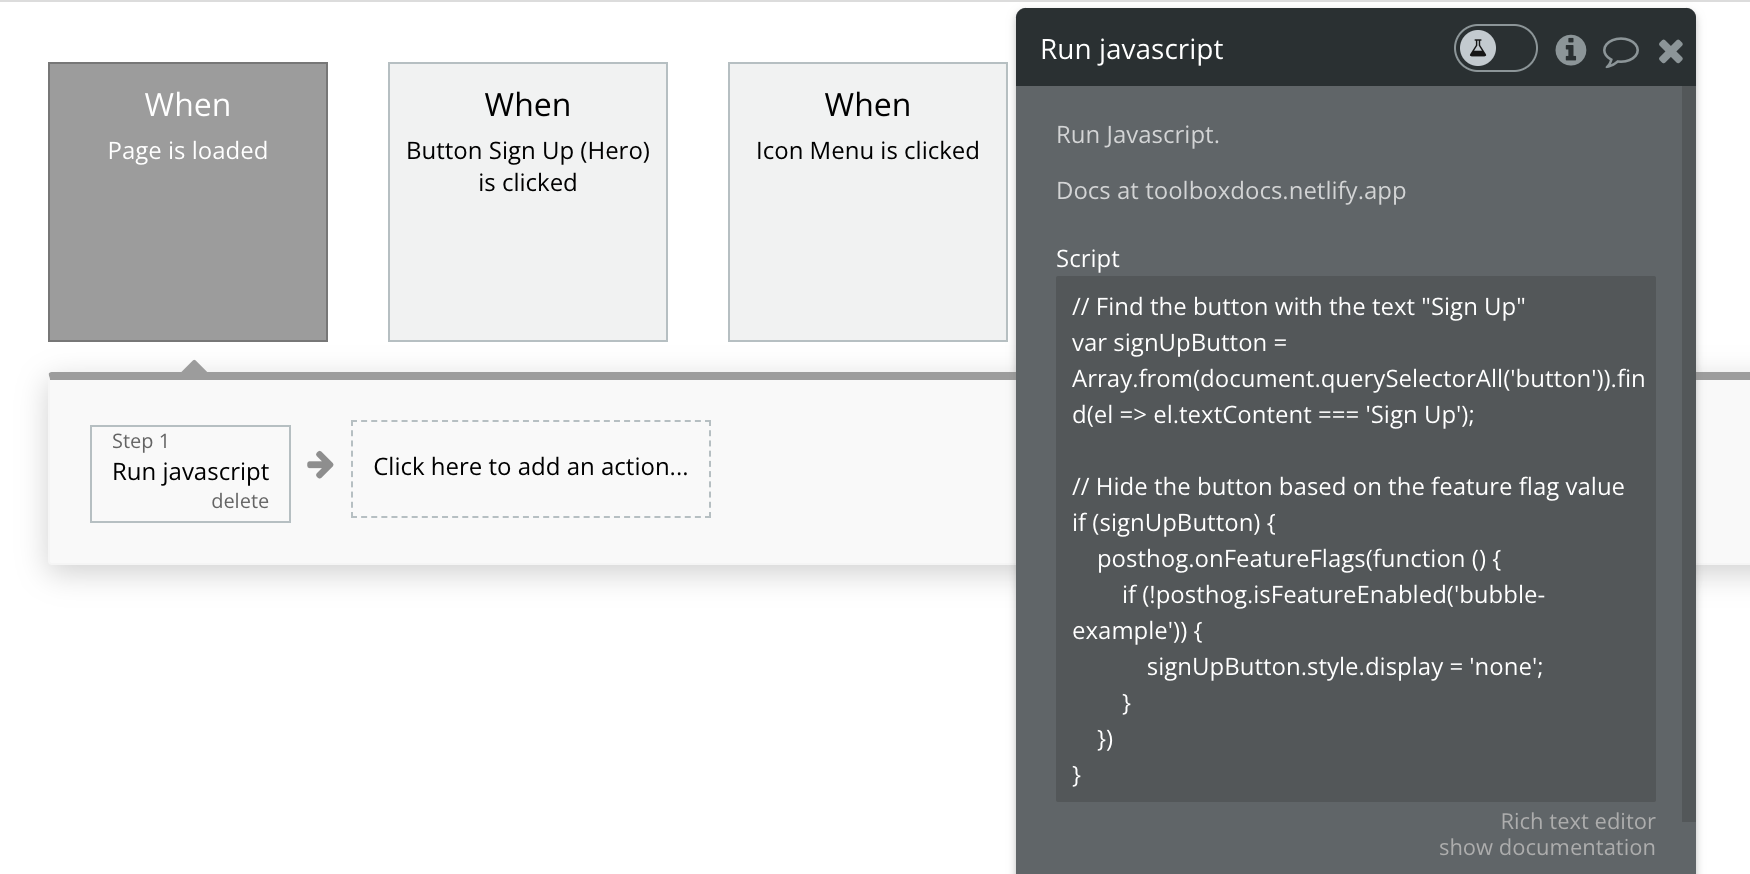
Then go back to Bubble. Create a new **Page is loaded** workflow event with an action to run custom JavaScript code (like we did for [capturing custom events](#how-to-capture-custom-events)). Use the following code to hide the button based on the value of the feature flag:
```js
// Find the button with the text "Sign Up"
var signUpButton = Array.from(document.querySelectorAll('button')).find(el => el.textContent === 'Sign Up');
// Hide the button based on the feature flag value
if (signUpButton) {
posthog.onFeatureFlags(function () {
if (posthog.isFeatureEnabled('show-signup-button')) {
signUpButton.style.display = 'none';
}
})
}
```
When we save this and publish the site again, the button is still there. When we go back to PostHog and disable the `show-signup-button` flag, the button disappears.
## Further reading
- [How to run A/B tests in Bubble](/tutorials/bubble-ab-tests)
- [How to create surveys in Bubble](/tutorials/bubble-surveys)
- [How to analyze first and last touch attribution](/tutorials/first-last-touch-attribution)