---
title: How to query a CSV in PostHog
date: 2024-09-30
author:
- ian-vanagas
tags:
- data warehouse
---
PostHog can capture a lot of data about your users. For data it can't capture, you can leverage the [data warehouse](/data-warehouse) to manually upload any data you'd like as a CSV
This tutorial shows you how to upload a CSV to storage, connect that storage source to PostHog, and then query the CSV alongside your data in PostHog.
## Creating and uploading our CSV
For this tutorial, we can create an example CSV with a list of users for an imaginary video conferencing company which looks like this:
```csv
user_id,full_name,email,join_date,subscription_type,total_meetings_hosted,total_meetings_attended
001,John Doe,johndoe@example.com,2023-01-15,Pro,45,60
002,Jane Smith,janesmith@example.com,2022-11-30,Free,10,25
003,Michael Brown,michaelbrown@example.com,2023-03-10,Pro,55,70
004,Linda Green,lindagreen@example.com,2022-12-25,Business,120,150
005,David Lee,davidlee@example.com,2023-07-05,Free,5,10
006,Sarah Johnson,sarahj@example.com,2023-05-20,Business,75,80
007,Ian Vanagas,ian@posthog.com,2023-02-15,Pro,40,55
```
To get this into PostHog, we need to upload it into storage. The easiest way to do this is to use [Cloudflare R2](/docs/data-warehouse/setup/r2), but you can also use other storage services like [S3](/docs/data-warehouse/setup/s3), [Azure Blob](/docs/data-warehouse/setup/azure-blob), or [GCS](/docs/data-warehouse/setup/gcs).
After signing up for Cloudflare, go to your dashboard and create a new bucket (if you haven't already). We suggest using Eastern North America as a location hint if you're using PostHog Cloud US or European Union as a specific jurisdiction if you're using PostHog Cloud EU.
With the bucket created, upload your `.csv`.

## Connecting our R2 bucket to PostHog
With our bucket setup and `.csv` upload, we are ready to connect it to PostHog.
1. In Cloudflare, go to the R2 overview, and under account details, click **Manage R2 API Tokens.**
2. Click **Create API token**, give your token a name, choose **Object Read only** as the permission type, apply it to your bucket, and click **Create API Token.**
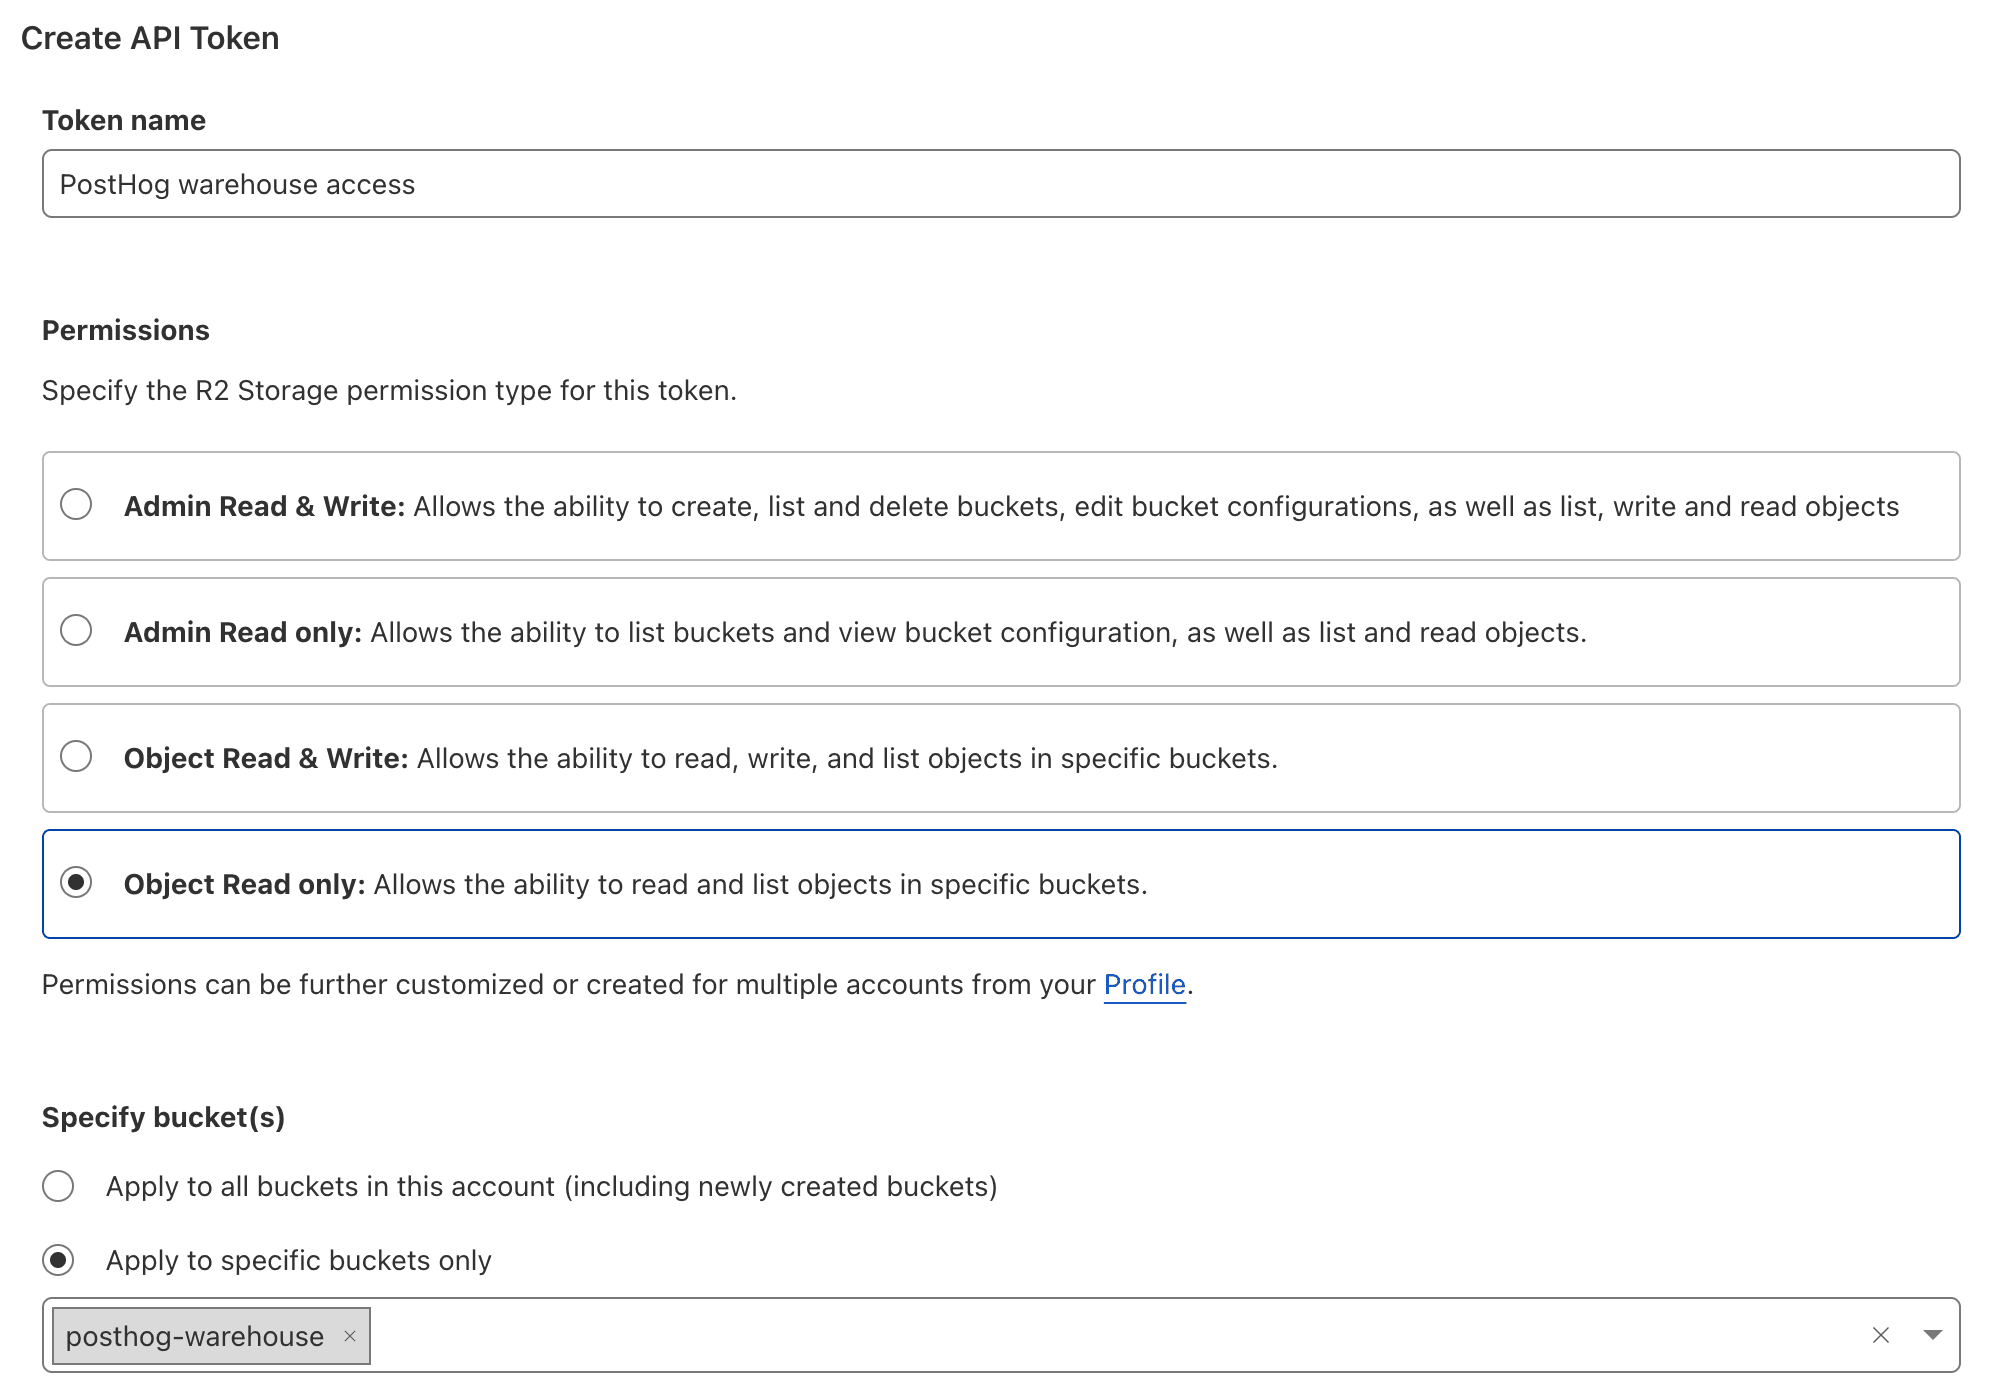
1. Copy the credentials for S3 clients, including the **Access Key ID**, **Secret Access Key**, and jurisdiction-specific endpoint URL. These are not shown again, so copy them to a safe place.
With these, we can add the bucket to PostHog:
1. Go to the [sources tab](https://us.posthog.com/pipeline/sources) of the data pipeline section in PostHog.
2. Click [**New source**](https://us.posthog.com/project/52792/pipeline/new/source) and under self managed, look for **Cloudflare R2** and click **Link.**
3. Fill the table name for use in PostHog (like `csv_users`), then use the data from Cloudflare to fill out the rest of the fields:
- For files URL pattern, use the jurisdiction-specific endpoint URL with your bucket and file name like `https://b27344y7bd543c.r2.cloudflarestorage.com/posthog-warehouse/my_users.csv`.
- Choose the **CSV with headers** format.
- For the access key, use your Access Key ID.
- For the secret key, use your Secret Access Key.
4. Finally, click **Next** to link the bucket to PostHog.
## Querying CSV data in PostHog
Once linked, we can query the data in PostHog by creating a [new SQL insight](https://us.posthog.com/insights/new) and querying the newly created table like this:
```sql
SELECT * FROM csv_users
```
This gets all the data from the CSV.
We can use [the features of SQL](/docs/product-analytics/sql) to filter and transform the data. For example, to get the pro or business users with the highest `total_meetings_hosted`, we can do this:
```sql
SELECT email, total_meetings_hosted
FROM csv_users
WHERE subscription_type = 'Pro' OR subscription_type = 'Business'
ORDER BY total_meetings_hosted DESC
```
### Joining CSV data to persons
When your data relates to [people](/docs/data/persons) in PostHog, you can create a [join](/docs/data-warehouse/join) between it and our `persons` table. This makes your CSV data much more useful by acting like extended person properties.
To do this:
1. Go to the data warehouse tab and find the [`persons` table](/docs/data-warehouse/sources/posthog#persons), click the three dots next to it, and click **Add join**.
2. In the popup, set the **Source Table Key** to a property that both tables include, in our case, that is `email`. To access it, we use SQL to set our **Source Table Key** to `properties.email`.
3. Choose `csv_users` as your **Joining Table** and `email` as your **Joining Table Key.**
4. Click **Save**.
Once you've done this, you can then query your CSV data from the persons table like this:
```sql
select csv_users.total_meetings_hosted
from persons
where properties.email = 'ian@posthog.com'
```
You can also use these extended person properties in insights. For example, you can get pageviews for users with the pro subscription type by selecting `csv_users: subscription_type` from extended person properties when creating an insight.
## Further reading
- [How to query Supabase data in PostHog](/tutorials/supabase-query)
- [How to set up Google Ads reports](/tutorials/google-ads-reports)
- [The basics of SQL for analytics](/product-engineers/sql-for-analytics)