---
title: 'Setting up Django analytics, feature flags, and more'
sidebar: Docs
showTitle: true
author:
- ian-vanagas
date: 2022-12-15
featuredTutorial: false
featuredVideo: 'https://www.youtube-nocookie.com/embed/QB-PI_ZXkwo'
tags:
- configuration
- feature flags
- persons
- events
---
Django is a popular Python web framework. It’s used by thousands of teams and developers around the world, including PostHog, to build apps, websites, APIs, and more.
In this tutorial, we go from nothing to a full Django app with all of the PostHog tools setup. These include [autocapture](/docs/data/autocapture), [session recordings](/manual/recordings), custom event capture, connecting frontend and backend user identification, and [feature flags](/manual/feature-flags).
> Already know how to setup a Django app? [Skip the app setup and go straight to the PostHog setup](#3-adding-posthog).
## 1. Setting up a basic Django app
We are starting from scratch, so we are creating a basic Django site. I’ll assume you’ve installed [Python](https://www.python.org/) and [venv](https://docs.python.org/3/library/venv.html) (or the virtual environment tool of your choice).
We’ll run through some commands to run in your terminal to get started. First, create a virtual environment.
```bash
python3 -m venv env
```
Activate the environment (this keeps the details on all the libraries you install).
```bash
. env/bin/activate
```
Install Django.
```bash
python -m pip install Django
```
Create a Django project, we are naming ours “tutorial.” This name matters less than the app name we create later.
```bash
django-admin startproject tutorial
```
Move into the tutorial folder (`cd tutorial`) and run the command to start the server.
```bash
python manage.py runserver
```
Going to your [local host](http://127.0.0.1:8000/) should bring you to a page that looks like this:

This is a basic Django app up and running. After confirming it’s working, shut down the server, and run the default migrations.
```bash
python manage.py migrate
```
## 2. Adding basic functionality to the Django app
With a site up, it is time to customize it to what we need. We won’t do anything fancy for this tutorial. Our app will be a blog with basic user authentication to show off all the features of PostHog.
The first step in doing this is creating a Django app with the name `blog`.
```bash
python manage.py startapp blog
```
This creates a new blog folder within our `tutorial` project (folder). We activate this app in `tutorials/settings.py` by adding it to `INSTALLED_APPS`.
```python
# tutorial/settings.py
INSTALLED_APPS = [
'blog.apps.BlogConfig', # new
'django.contrib.admin',
'django.contrib.auth',
'django.contrib.contenttypes',
'django.contrib.sessions',
'django.contrib.messages',
'django.contrib.staticfiles',
]
```
### Model
Next, we create our blog model in our blog app `models.py` file. The model is simple: title, content, created date, and author. We’ll use the default user model from settings for this tutorial, but Django has many options for creating custom ones.
```python
# blog/models.py
from django.db import models
from django.conf import settings
class Post(models.Model):
title = models.CharField(max_length=100)
content = models.TextField()
created_at = models.DateTimeField(auto_now_add=True)
author = models.ForeignKey(settings.AUTH_USER_MODEL, on_delete=models.CASCADE)
def __str__(self):
return self.title
```
Once done, we can create a migration and run it. This adds the `Post` model data to our database.
```bash
python manage.py makemigrations blog
python manage.py migrate
```
To see the `Post` model on the admin page, we register it in our blog app `admin.py` file. This enables us to add posts in the admin panel.
```python
# blog/admin.py
from django.contrib import admin
from .models import Post
admin.site.register(Post)
```
To access the admin panel and create blogs there, we create a superuser. Running this command prompts you for information like username, email, and password which creates a superuser and enables you to login to the admin panel.
```bash
python manage.py createsuperuser
```
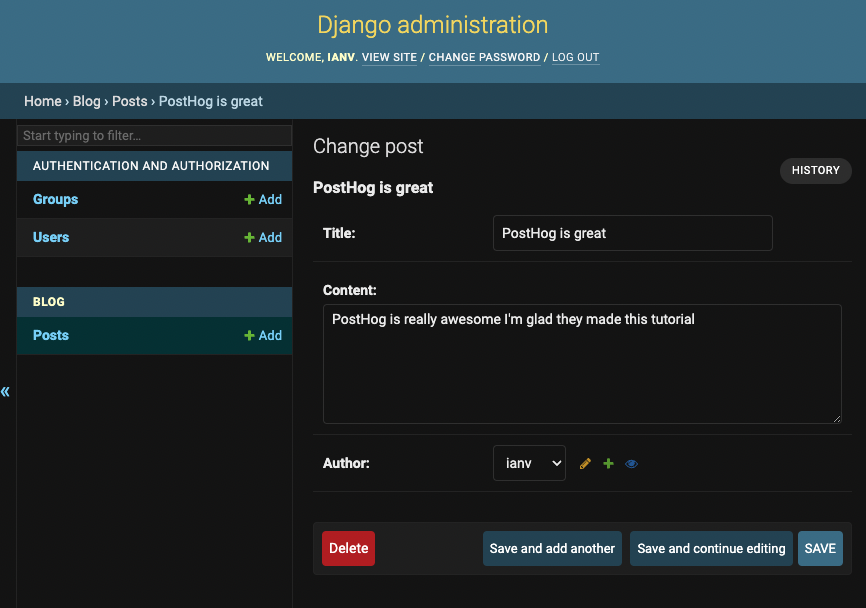
Once you’ve created a superuser, you can go to the [admin panel](http://127.0.0.1:8000/admin) (`/admin`), login, and create a couple of blog posts. Once created and saved, we’ll setup the view to show them.
### View
After adding a couple of blog posts, go back to our code and create the template and view to display these blog posts. First, we need a template. Django checks for templates in a bit of a strange way. Create a template folder in your blog app, then add a blog folder in the template folder, and finally, add a `home.html` file as our template. The file structure looks like this `tutorial/blog/template/blog/home.html`.
The `home.html` file loops through our posts and show the `title`, `created_at` date, `author`, and `content` for each of them. We also show the logged in user, which we do through the admin page for now (it is useful for identification later).
```html
My cool blog
My cool blog
{% for post in posts %}
{{ post.title }}
Created: {{ post.created_at }}
Author: {{ post.author }}
{{ post.content }}
{% endfor %}
Logged in as: {{user}}
```
To populate this template, create a view. Luckily, Django has generic views we can use. We can create a `ListView` for our `Post` model.
```python
# blog/views.py
from django.views.generic import ListView
from .models import Post
class PostListView(ListView):
model = Post
template_name = 'blog/home.html'
context_object_name = 'posts'
```
Create a `urls.py` file in our `blog` app and add the view.
```python
# blog/urls.py
from django.urls import path
from .views import PostListView
urlpatterns = [
path('', PostListView.as_view(), name='home'),
]
```
Finally, include the `blog` app URLs in the tutorial project `urls.py` file.
```python
# tutorials/urls.py
from django.contrib import admin
from django.urls import path, include
urlpatterns = [
path('', include('blog.urls')),
path('admin/', admin.site.urls),
]
```
Once you save all of this, reload your server, and open your [development site](http://127.0.0.1:8000/). You should see a page with a list of blog posts.

## 3. Adding PostHog
With a basic Django app all setup, we can add PostHog to track user behavior. We can do this in two ways, adding the snippet or using the Python library.
### Adding the snippet
PostHog makes it easy to get started fast with autocapture. This captures events like pageviews, button and link clicks, field inputs, allows for session recordings, and more.
> To enable session recordings, toggle on “Record user sessions” in project settings under “Recordings”
In a new project’s getting started flow or your project settings, copy the HTML snippet and add it into the `` tag of your `base.html` page.

```html
My cool blog
My cool blog
{% for post in posts %}
{{ post.title }}
Created: {{ post.created_at }}
Author: {{ post.author }}
{{ post.content }}
{% endfor %}
Logged in as: {{user.email}}
```
Once you save and reload, autocapture immediately starts working. Refreshing the page gives you a `pageview` event, and you’ll be all setup to capture more events as you add more functionality. To verify that your `pageview` events are captured correctly, login to PostHog and check the Live Events feed via the sidebar.
### Installing and using the library
The snippet is great for getting started fast, but it doesn’t provide customizability or access to many PostHog features like custom events, feature flags, user identification, experiments, and group analytics.
We can add all this functionality with the PostHog Python library, and this starts with installing it.
```bash
pip install posthog
```
In your `tutorial` project settings page, add your `project_api_key` (found in project settings) and your `api_host` (like `https://us.i.posthog.com` or `https://eu.i.posthog.com` if you’re on Cloud).
```python
# tutorials/settings.py
import posthog
posthog.project_api_key = ''
posthog.host = ''
```
Once you’ve done this, you can import PostHog where ever you want it. See more details about setup and PostHog Python features in the [Python docs here](/docs/integrate/server/python).
## 4. Setting up more PostHog features
With PostHog setup, we can get access to more of the features PostHog provides like custom events, user identification, and feature flags.
### Custom events
Autocapture might not be enough for you. If you want custom events, or any events coming from your backend, you add and instrument them yourself. To do so, use the PostHog Python library.
In our `views.py` `PostListView`, import PostHog. Add the `get_context_data` method and setup a loop to capture a `blog view` event for each blog post that gets shown if the user is logged in. The event connects to the user (through their email) and has the post title as a property.
```python
from django.views.generic import ListView
import posthog # new
from .models import Post
class PostListView(ListView):
model = Post
template_name = 'blog/home.html'
context_object_name = 'posts'
def get_context_data(self, **kwargs): # new
context = super().get_context_data(**kwargs)
if self.request.user.is_authenticated:
for post in context['posts']:
posthog.capture(
self.request.user.email,
'blog_view',
{'blog': post.title}
)
return context
```
We check if the user is logged in because every custom event must have a distinct ID connected to it.
### Connecting front and backend identities
In PostHog, each event must include a distinct user ID. We didn’t have to worry about this with our snippet because it automatically generates these IDs from the device ID (a string of numbers and letters).
If we have the user’s email (as we showed in the last section), we can use it to connect to events. The problem is this leads to one person having two distinct IDs (email and auto-generated frontend ID). We can connect these two distinct IDs to give us a clearer picture of a user’s behavior.
To do this, we can process and check the cookies sent in the request, then check for the distinct ID, and finally `alias` the distinct ID from the frontend (stored in a cookie) with the distinct ID in the backend (email).
We do a bit of work (`unquote` and `json.loads`) to process the cookie string into a dictionary. We also want to check that the user `is_authenticated` (has an email) so we can connect the two.
```python
from django.views.generic import ListView
from urllib.parse import unquote # new
import json # new
import posthog
from .models import Post
class PostListView(ListView):
model = Post
template_name = 'blog/home.html'
context_object_name = 'posts'
def get_context_data(self, **kwargs):
context = super().get_context_data(**kwargs)
posthog_cookie = self.request.COOKIES.get( # new
f'ph_{posthog.project_api_key}_posthog'
)
if posthog_cookie:
cookie_dict = json.loads(unquote(posthog_cookie))
if cookie_dict['distinct_id'] and self.request.user.is_authenticated:
posthog.alias(
cookie_dict['distinct_id'],
self.request.user.email
)
return context
```
Implementing this enables you to combine user data from events in the front and backend to identify them and get a better understanding of their behavior.
### Using feature flags
With identities sorted, we can use feature flags on the backend. We need identities setup because feature flags check against distinct IDs to decide whether they should run or not.
To show off feature flags, add an optional call to action at the bottom of our blog post, and show it if the feature flag is active. Our `home.html` file looks like this now:
```html
My cool blog
My cool blog
{% for post in posts %}
{{ post.title }}
Created: {{ post.created_at }}
Author: {{ post.author }}
{{ post.content }}
{% if cta %}
Go to PostHog
{% endif %}
{% endfor %}
Logged in as: {{user.email}}
```
Next, go to our PostHog project and create a feature flag named `blog-cta` and set it to all users for now.
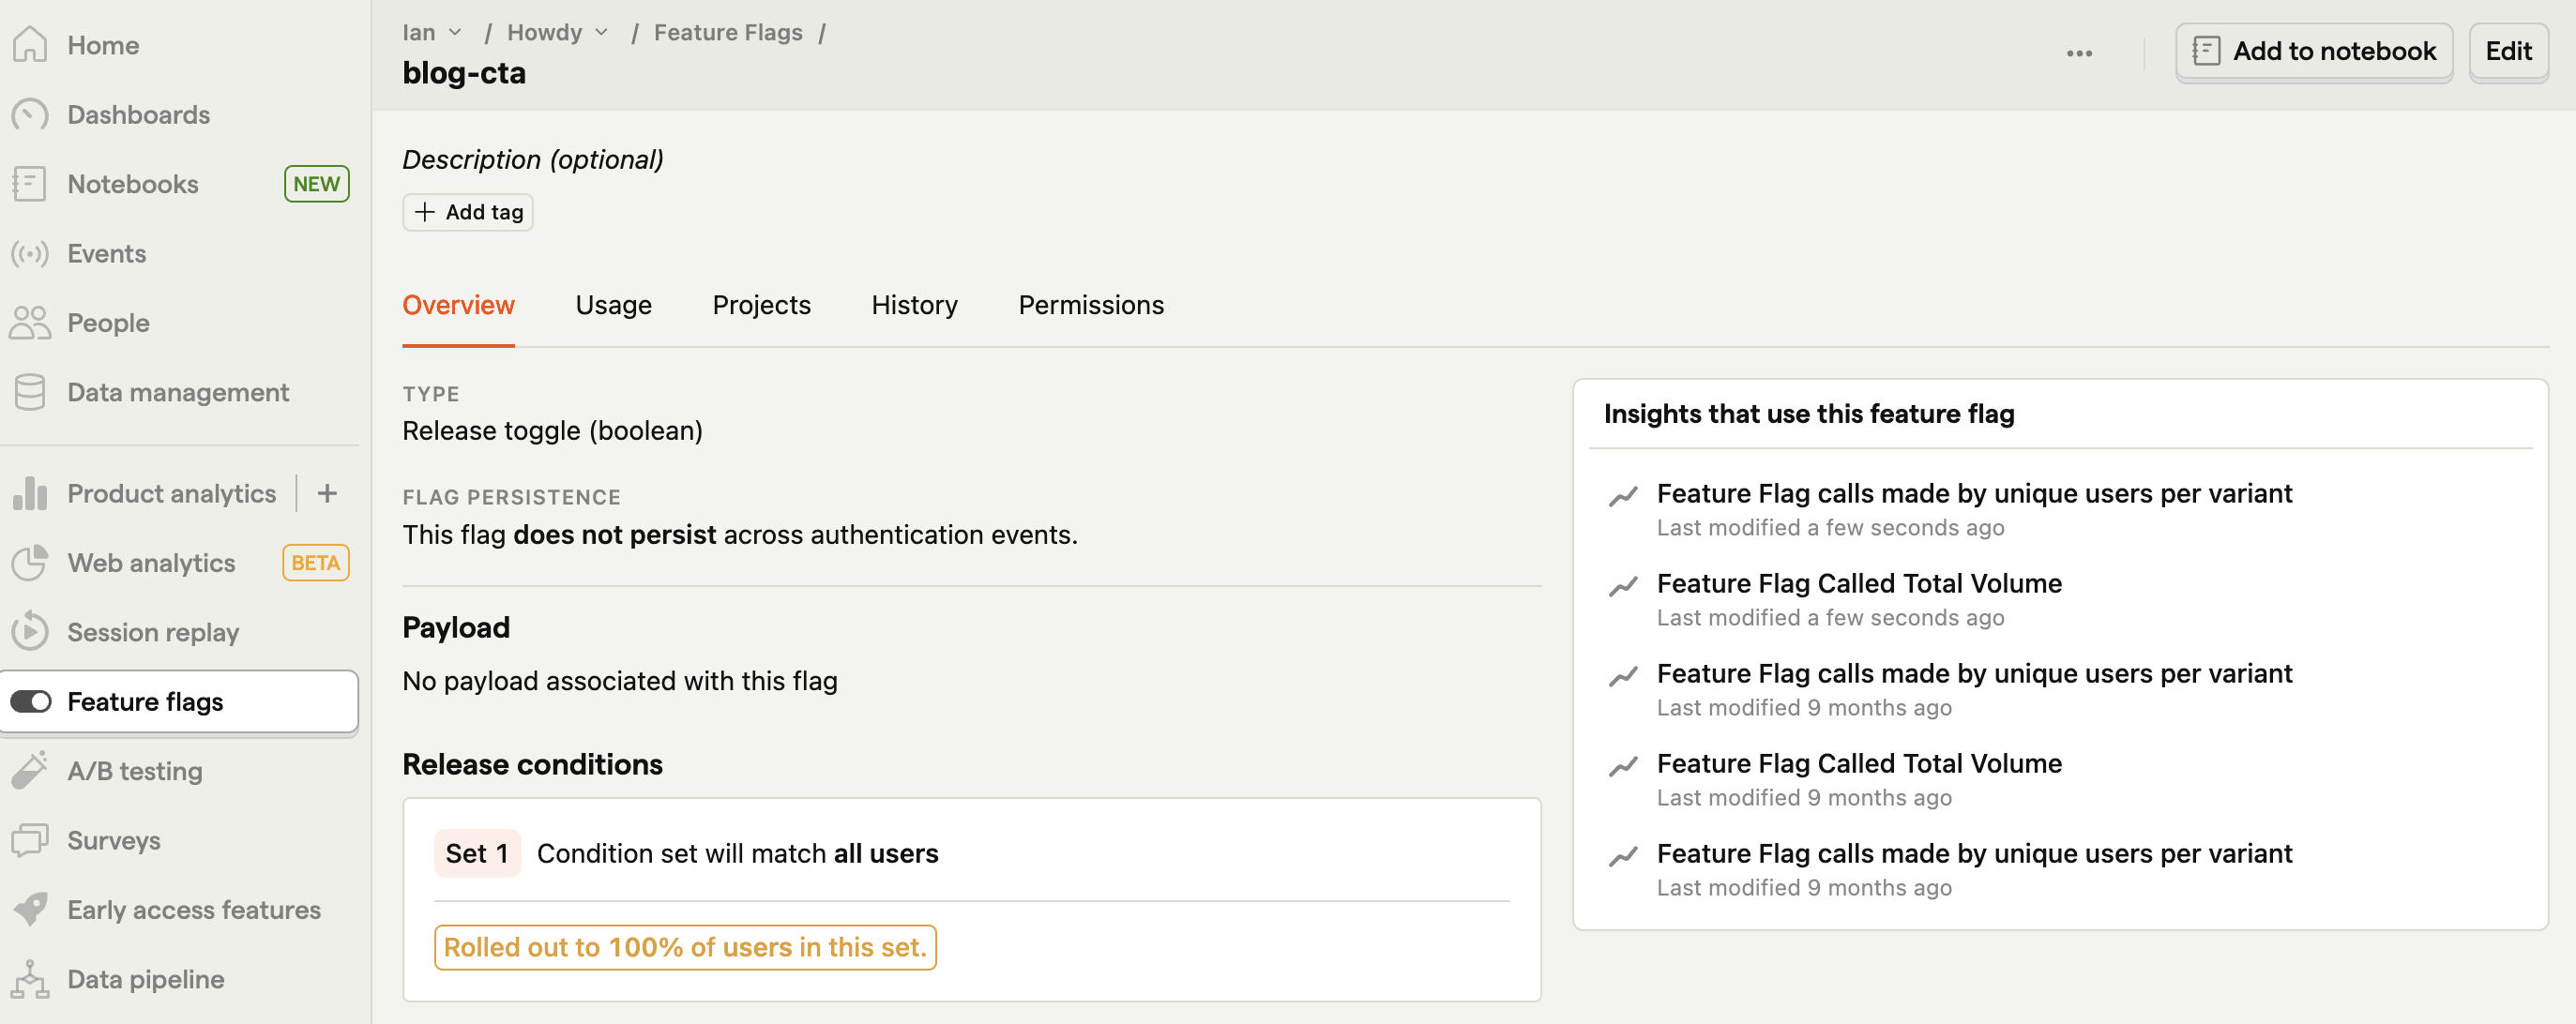
We can copy the Python code it gives us, add it to our `get_context_data` function in our `PostListView`, and modify it to work with our code. The code checks if the feature flag is active for that user, and if so, show the call to action.
```python
from django.views.generic import ListView
import posthog
from .models import Post
class PostListView(ListView):
model = Post
template_name = 'blog/home.html'
context_object_name = 'posts'
def get_context_data(self, **kwargs):
context = super().get_context_data(**kwargs)
if self.request.user.is_authenticated: # new
if posthog.feature_enabled("blog-cta", self.request.user.email):
context['cta'] = True
return context
```
Finally, when we go back to our site, the feature flag is active and the CTA is showing.

> We can also get the feature flags from the cookie by checking the dictionary for `$active_feature_flags`. This means that the user wouldn’t need to login for us to show them the feature flag.
## Wrapping up
With autocapture, session recordings, feature flags, identification, and custom events out of the way, you implemented many of the most important features of PostHog on your new Django project. Next is customizing further with group analytics, experiments, and integrations, all of which you can find out more about in [our Python documentation](/docs/integrate/server/python).
## Further reading
- [How to set up A/B tests in Django](/tutorials/django-ab-tests)
- [Understanding group analytics: frontend vs backend implementations](/tutorials/frontend-vs-backend-group-analytics)
- [Complete guide to event tracking](/tutorials/event-tracking-guide)