mirror of
https://github.com/BillyOutlast/posthog.com.git
synced 2026-02-04 19:31:21 +01:00
* Newsletter form improvement

* Apply suggestions from code review

* Changing image and copy

* Image change

* Copy tweak

* Tweak

* Tweaks

* another try

* Apply suggestions from code review

Co-authored-by: Lior539 <lneuner@gmail.com>

* Update index.tsx

* Image tweak

* putting engineer post back

---------

Co-authored-by: Lior539 <lneuner@gmail.com>
51 lines
2.7 KiB
Plaintext
51 lines
2.7 KiB
Plaintext
---
|
||
title: "How to setup Ghost analytics and session replay"
|
||
date: 2024-10-11
|
||
featuredTutorial: false
|
||
author:
|
||
- danilo-campos
|
||
tags:
|
||
- product analytics
|
||
- web analytics
|
||
- session replay
|
||
---
|
||
|
||
import Snippet from "../docs/integrate/snippet.mdx"
|
||
|
||
With all the drama in the world of WordPress, it’s a great time to explore Ghost, a robust blogging and newsletter CMS. You can [self-host](https://ghost.org/docs/install/) Ghost on your own server, or lean on managed hosting from [Ghost.org](https://ghost.org).
|
||
|
||
However you host, adding PostHog for [web analytics](/docs/web-analytics), [product analytics](/docs/product-analytics), and [session replay](/docs/session-replay) is a quick process that gives you immediate insight about how people are finding your site, enjoying your writing, and exploring your archives. PostHog is free, so sign up and follow along.
|
||
|
||
## Adding PostHog using Ghost’s code injection
|
||
|
||
Grab the PostHog snippet from [your project settings](https://us.posthog.com/project/2/settings/project#snippet):
|
||
|
||
<Snippet />
|
||
|
||
In your Ghost publication’s settings, click the settings button, labeled with a **gear icon**:
|
||
|
||

|
||
|
||
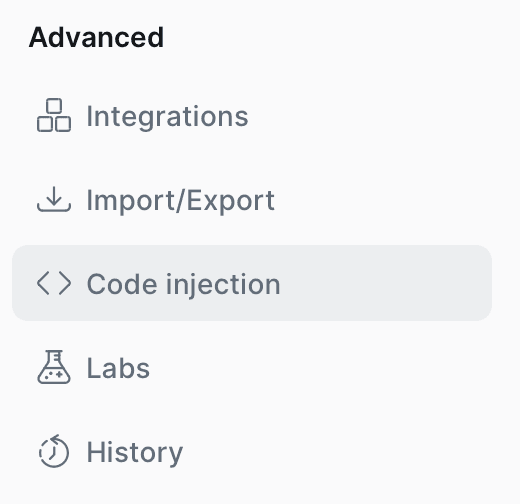
Scroll toward the bottom of the sidebar, looking for **Advanced**, and select **Code Injection**. Open the code injection setting:
|
||
|
||
|
||
|
||
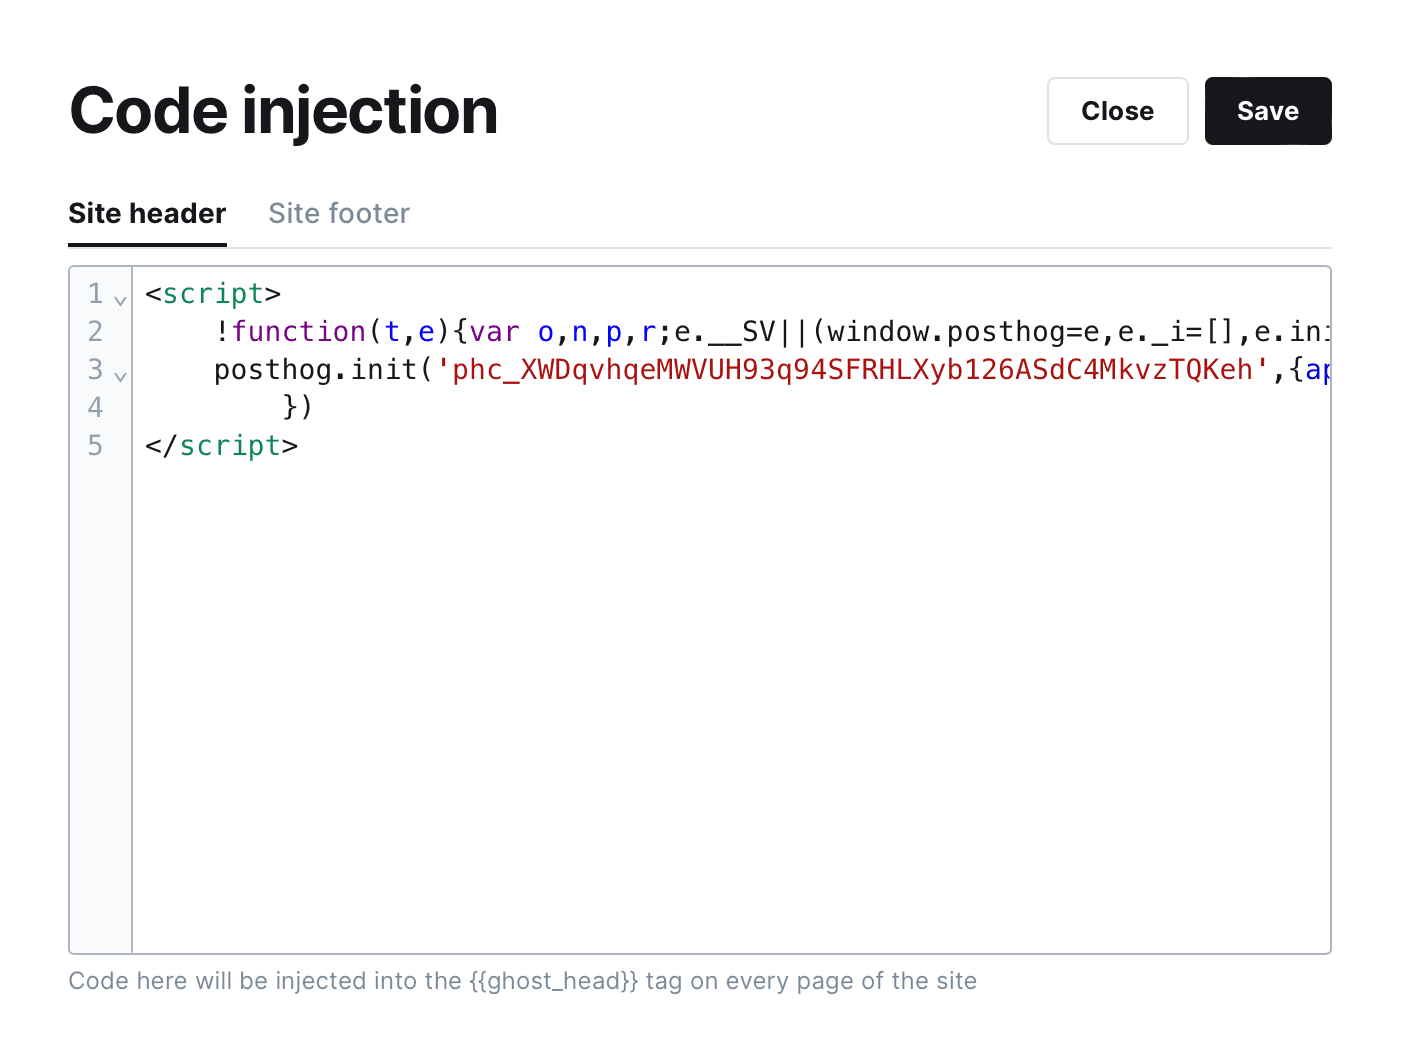
Paste the PostHog script into the **Site header** code block:
|
||
|
||
|
||
|
||
Click **Save**, and you’re all set. Explore your blog to generate some activity, then head to PostHog to see the results.
|
||
|
||
|
||
|
||
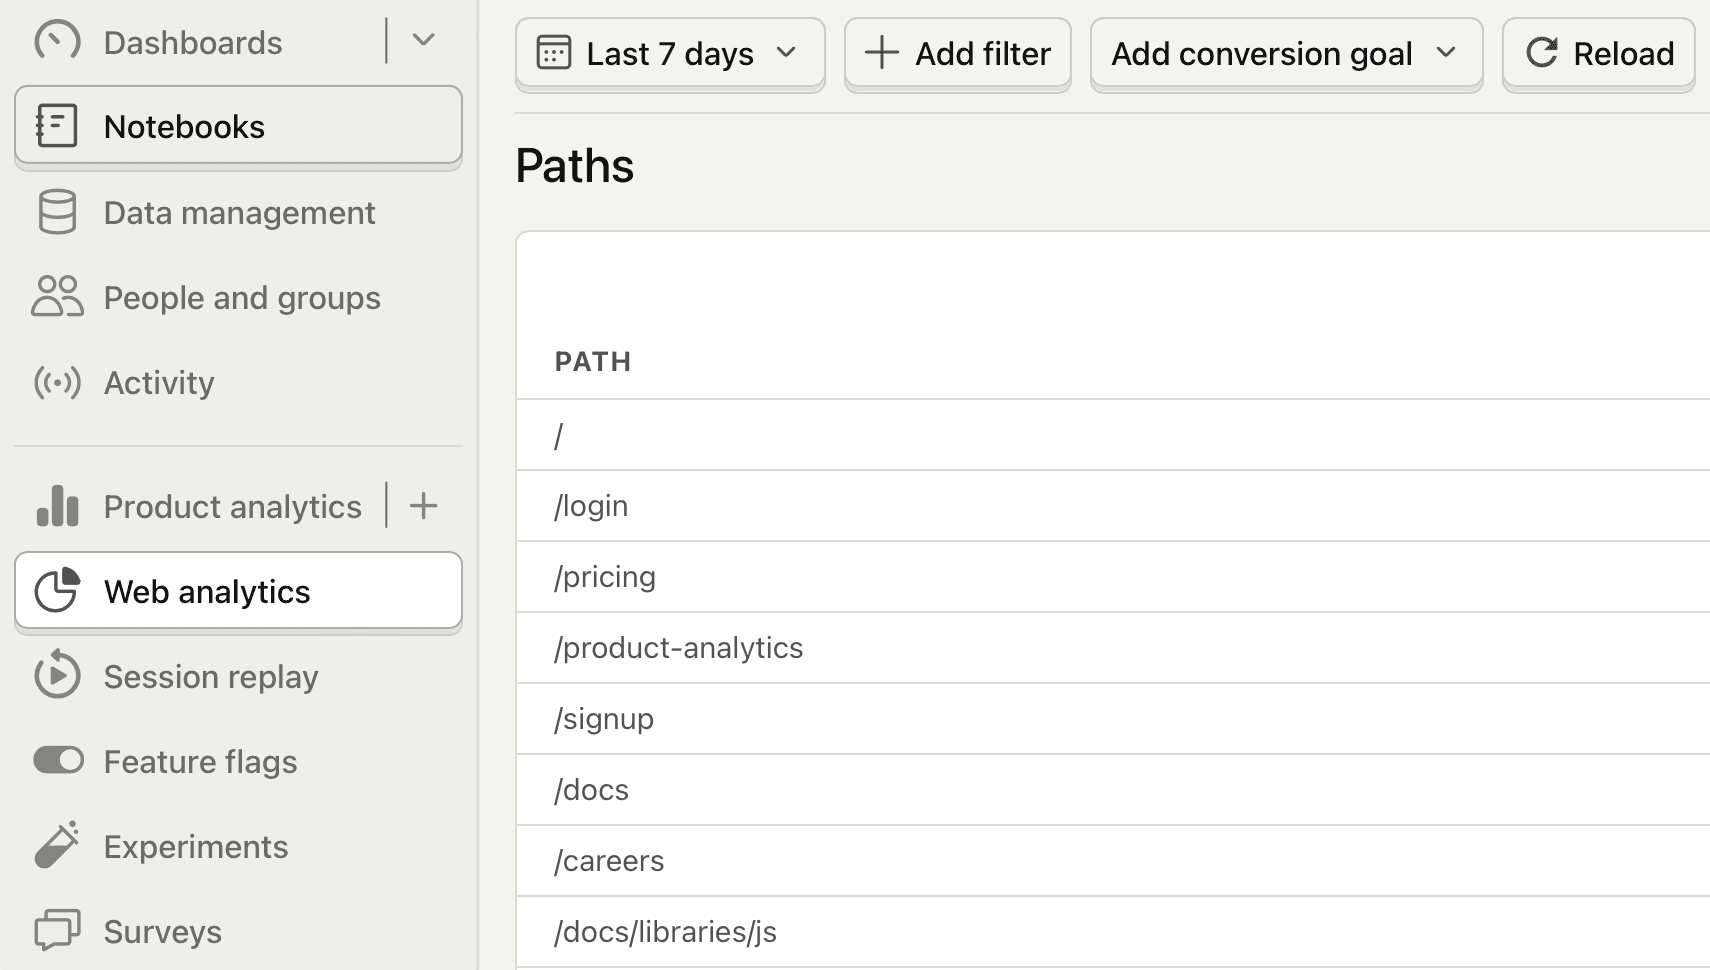
Hit the [web analytics tab](https://us.posthog.com/web) to see the basics, including your top-performing content in the paths report. Channels will show you high level traffic sources. Use the retention report to see how often readers are coming back once they find you.
|
||
|
||
Once set up, you can enable session replay in [your project settings](https://us.posthog.com/settings/project-replay#replay) under **Record user sessions** to give you a look at real reader behavior through your site. Click [its tab](https://us.posthog.com/replay/home) to explore replays.
|
||
|
||
## Further reading
|
||
|
||
- [What to do after installing PostHog in 5 steps](/tutorials/next-steps-after-installing)
|
||
- [How to track performance marketing in PostHog](/tutorials/performance-marketing)
|
||
- [How to do cookieless tracking with PostHog](/tutorials/cookieless-tracking)
|
||
|
||
<NewsletterForm /> |