mirror of
https://github.com/BillyOutlast/posthog.com.git
synced 2026-02-05 20:01:20 +01:00
163 lines
5.0 KiB
Markdown
163 lines
5.0 KiB
Markdown
---
|
||
title: How to set up React error tracking
|
||
date: 2025-03-21
|
||
author:
|
||
- ian-vanagas
|
||
tags:
|
||
- error tracking
|
||
---
|
||
|
||
Errors are inevitable when building apps. Setting up error tracking limits their impact by helping you identify, debug, and fix them fast.
|
||
|
||
To show you how to set this up, we'll create a basic React app, set up PostHog, and then use it to autocapture errors in your app.
|
||
|
||
## 1. Creating a React app with Vite
|
||
|
||
First, ensure [Node.js is installed](https://nodejs.dev/en/learn/how-to-install-nodejs/) (version 18.0 or newer) and then create a new React app with Vite:
|
||
|
||
```bash
|
||
npm create vite@latest react-error-tracking -- --template react
|
||
cd react-error-tracking
|
||
npm install
|
||
```
|
||
|
||
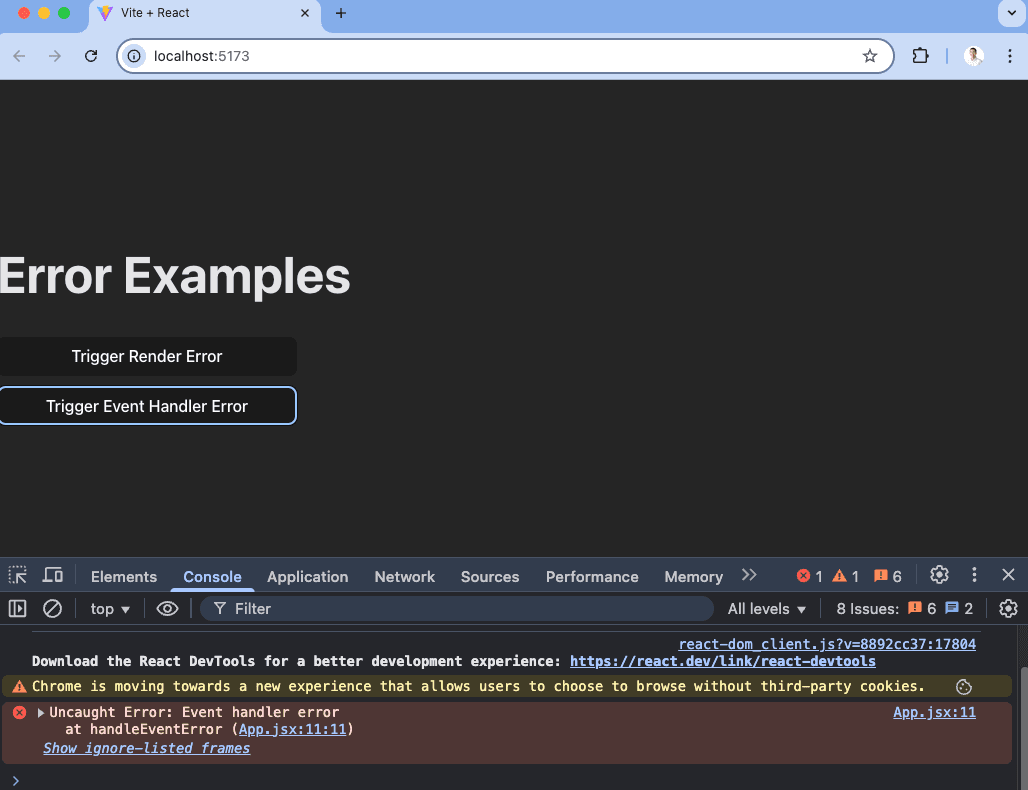
Our app will be a page that can trigger both render errors and manually thrown errors. To do this, set up each of them in `App.jsx` like this:
|
||
|
||
```js
|
||
import { useState } from 'react';
|
||
|
||
export default function App() {
|
||
const [shouldError, setShouldError] = useState(false);
|
||
|
||
const handleRenderError = () => {
|
||
setShouldError(true);
|
||
};
|
||
|
||
const handleEventError = () => {
|
||
throw new Error("Event handler error");
|
||
};
|
||
|
||
// This causes a render error
|
||
if (shouldError) {
|
||
throw new Error("Render error");
|
||
}
|
||
|
||
return (
|
||
<div>
|
||
<h1>Error Examples</h1>
|
||
<div style={{ display: 'flex', flexDirection: 'column', gap: '10px', maxWidth: '300px' }}>
|
||
<button onClick={handleRenderError}>
|
||
Trigger Render Error
|
||
</button>
|
||
|
||
<button onClick={handleEventError}>
|
||
Trigger Event Handler Error
|
||
</button>
|
||
|
||
</div>
|
||
</div>
|
||
);
|
||
}
|
||
```
|
||
|
||
Now, we can run `npm run dev` and click the buttons to trigger the different types of errors.
|
||
|
||
|
||
|
||
## 2. Setting up PostHog for error tracking
|
||
|
||
Next, we'll set up PostHog to capture these errors. First, we need to install `posthog-js` and `@posthog/react`:
|
||
|
||
```bash
|
||
npm install posthog-js @posthog/react
|
||
```
|
||
|
||
Next, create a `PostHogProvider.jsx` file in your `src` directory, and in it, initialize PostHog using your project API key and host from [your project settings](https://us.posthog.com/settings/project). While you are there, make sure that [exception autocapture](https://us.posthog.com/settings/environment-error-tracking#error-tracking-exception-autocapture) is enabled.
|
||
|
||
```js
|
||
// src/PostHogProvider.jsx
|
||
import { useEffect } from 'react';
|
||
import posthog from 'posthog-js';
|
||
import { PostHogProvider as PHProvider } from '@posthog/react';
|
||
|
||
export function PostHogProvider({ children }) {
|
||
useEffect(() => {
|
||
posthog.init('<ph_project_api_key>', {
|
||
api_host: '<ph_client_api_host>',
|
||
defaults: '<ph_posthog_js_defaults>',
|
||
});
|
||
}, []);
|
||
|
||
return (
|
||
<PHProvider client={posthog}>
|
||
{children}
|
||
</PHProvider>
|
||
);
|
||
}
|
||
```
|
||
|
||
Once done, import it into `main.jsx` and wrap your app with it like this:
|
||
|
||
```js
|
||
import { StrictMode } from 'react'
|
||
import { createRoot } from 'react-dom/client'
|
||
import './index.css'
|
||
import App from './App.jsx'
|
||
import { PostHogProvider } from './PostHogProvider.jsx'
|
||
|
||
createRoot(document.getElementById('root')).render(
|
||
<StrictMode>
|
||
<PostHogProvider>
|
||
<App />
|
||
</PostHogProvider>
|
||
</StrictMode>,
|
||
)
|
||
```
|
||
|
||
Once done, re-run your app with `npm run dev` and PostHog will autocapture errors along with their details.
|
||
|
||
<ProductScreenshot
|
||
imageLight="https://res.cloudinary.com/dmukukwp6/image/upload/Clean_Shot_2025_03_21_at_16_33_15_2x_5edc2ebb79.png"
|
||
imageDark="https://res.cloudinary.com/dmukukwp6/image/upload/Clean_Shot_2025_03_21_at_16_33_25_2x_43995a751d.png"
|
||
alt="PostHog"
|
||
classes="rounded"
|
||
/>
|
||
|
||
You can also capture errors manually with PostHog’s `captureException` method like this:
|
||
|
||
```js
|
||
import { usePostHog } from '@posthog/react';
|
||
|
||
export default function App() {
|
||
const posthog = usePostHog();
|
||
|
||
const handleError = () => {
|
||
const error = new Error("Manual Error");
|
||
posthog.captureException(error);
|
||
}
|
||
|
||
return (
|
||
<div>
|
||
<h1>Error Example</h1>
|
||
<button onClick={handleError}>
|
||
Trigger Error
|
||
</button>
|
||
</div>
|
||
);
|
||
}
|
||
```
|
||
|
||
This is helpful if you have existing error handling logic you want to integrate PostHog into.
|
||
|
||
## 3. Monitoring errors in PostHog
|
||
|
||
Once you’ve set up error capture in your app, you can head to the [error tracking tab](https://us.posthog.com/error_tracking) in PostHog to review the issues popping up along with their frequency.
|
||
|
||
<ProductScreenshot
|
||
imageLight="https://res.cloudinary.com/dmukukwp6/image/upload/Clean_Shot_2025_03_21_at_16_35_28_2x_37f821fadd.png"
|
||
imageDark="https://res.cloudinary.com/dmukukwp6/image/upload/Clean_Shot_2025_03_21_at_16_35_12_2x_b55ab22cfb.png"
|
||
alt="PostHog"
|
||
classes="rounded"
|
||
/>
|
||
|
||
You can click into any of these errors to get more details on them, including a stack trace as well as archive, resolve, or suppress them. On top of this, you can analyze `$exception` events like you would any event in PostHog, including setting up [trends](/docs/product-analytics/trends/overview) for them and querying them with [SQL](/docs/product-analytics/sql). |