mirror of
https://github.com/BillyOutlast/posthog.com.git
synced 2026-02-07 12:51:21 +01:00
200 lines
6.7 KiB
Markdown
200 lines
6.7 KiB
Markdown
---
|
||
title: How to set up A/B tests in PHP
|
||
date: 2024-02-08
|
||
author:
|
||
- lior-neu-ner
|
||
tags:
|
||
- experimentation
|
||
---
|
||
|
||
import { ProductScreenshot } from 'components/ProductScreenshot'
|
||
export const EventsInPostHogLight = "https://res.cloudinary.com/dmukukwp6/image/upload/posthog.com/contents/images/tutorials/php-ab-tests/events-light.png"
|
||
export const EventsInPostHogDark = "https://res.cloudinary.com/dmukukwp6/image/upload/posthog.com/contents/images/tutorials/php-ab-tests/events-dark.png"
|
||
export const ResultsLight = "https://res.cloudinary.com/dmukukwp6/image/upload/posthog.com/contents/images/tutorials/php-ab-tests/results-light.png"
|
||
export const ResultsDark = "https://res.cloudinary.com/dmukukwp6/image/upload/posthog.com/contents/images/tutorials/php-ab-tests/results-dark.png"
|
||
|
||
A/B tests help you improve your PHP app by enabling you to compare the impact of changes on key metrics. To show you how to set one up, we create a basic PHP app, add PostHog, create an A/B test, and implement the code for it.
|
||
|
||
## 1. Create a basic PHP app
|
||
|
||
First, ensure [PHP](https://www.php.net/manual/en/install.php) is installed. Then, create a new folder for your project called `php-ab-tests`. In this folder, create an `index.php` file:
|
||
|
||
```bash
|
||
mkdir php-ab-tests
|
||
cd ./php-ab-tests
|
||
touch index.php
|
||
```
|
||
|
||
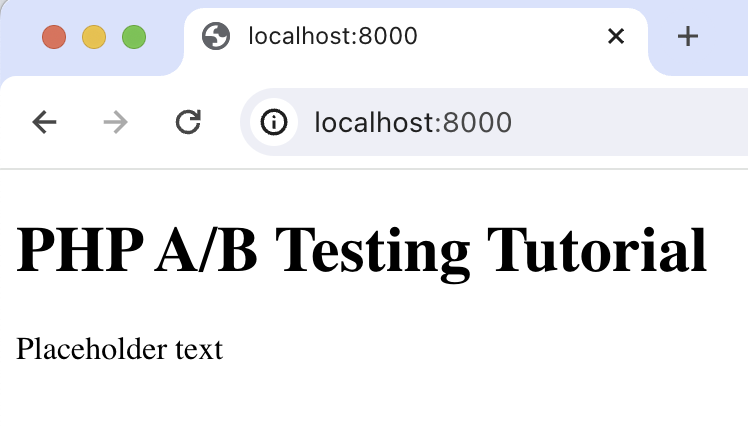
Next, add the following code to `index.php` to set up a basic page with a heading and paragraph:
|
||
|
||
```php file=index.php
|
||
<?php
|
||
$paragraphText = 'Placeholder text';
|
||
?>
|
||
|
||
<!DOCTYPE html>
|
||
<html>
|
||
<body>
|
||
<h1>PHP A/B Testing Tutorial</h1>
|
||
<p><?php echo $paragraphText; ?></p>
|
||
</body>
|
||
</html>
|
||
```
|
||
|
||
Run `php -S localhost:8000` and navigate to `http://localhost:8000` to see our app in action.
|
||
|
||
|
||
|
||
## 2. Add PostHog to your app
|
||
|
||
With our app set up, it’s time to install and set up PostHog. If you don't have a PostHog instance, you can [sign up for free](https://us.posthog.com/signup).
|
||
|
||
To start, make sure [Composer](https://getcomposer.org/) is installed. Then run `composer require posthog/posthog-php` to install [PostHog’s PHP SDK](/docs/libraries/php).
|
||
|
||
Then, initialize PostHog at the top of `index.php` using your project API key and instance address (you can find these in [your project settings](https://us.posthog.com/project/settings)):
|
||
|
||
```php file=index.php
|
||
<?php
|
||
require_once __DIR__ . '/vendor/autoload.php';
|
||
use PostHog\PostHog;
|
||
|
||
PostHog::init(
|
||
'<ph_project_api_key>',
|
||
['host' => '<ph_client_api_host>']
|
||
);
|
||
|
||
// rest of your code
|
||
```
|
||
|
||
Lastly, we [capture](/docs/product-analytics/capture-events) a `$pageview` event using `PostHog::capture()`:
|
||
|
||
```php file=index.php
|
||
<?php
|
||
require_once __DIR__ . '/vendor/autoload.php';
|
||
use PostHog\PostHog;
|
||
|
||
PostHog::init(
|
||
'<ph_project_api_key>',
|
||
['host' => '<ph_client_api_host>']
|
||
);
|
||
|
||
$paragraphText = 'Placeholder text';
|
||
$distinctId = 'placeholder-user-id';
|
||
|
||
PostHog::capture([
|
||
'distinctId' => $distinctId,
|
||
'event' => '$pageview'
|
||
]);
|
||
|
||
?>
|
||
|
||
<!-- your existing html code -->
|
||
```
|
||
|
||
With this set up, restart your app and then refresh your browser a few times. You should now see the captured event in your [PostHog activity tab](https://us.posthog.com/events).
|
||
|
||
<ProductScreenshot
|
||
imageLight={EventsInPostHogLight}
|
||
imageDark={EventsInPostHogDark}
|
||
alt="Events captured in PostHog"
|
||
classes="rounded"
|
||
/>
|
||
|
||
## 3. Create an A/B test in PostHog
|
||
|
||
Next, go to the [A/B testing tab](https://us.posthog.com/experiments) and create an A/B test by clicking the **New experiment** button. Add the following details to your experiment:
|
||
|
||
1. Name it "My cool experiment".
|
||
2. Set "Feature flag key" to `my-cool-experiment`.
|
||
3. Use the default values for all other fields.
|
||
4. Click **Save as draft**.
|
||
|
||
<ProductScreenshot
|
||
imageLight="https://res.cloudinary.com/dmukukwp6/image/upload/Clean_Shot_2025_01_16_at_09_53_57_2x_2b998be1a8.png"
|
||
imageDark="https://res.cloudinary.com/dmukukwp6/image/upload/Clean_Shot_2025_01_16_at_09_20_55_2x_4be4106819.png"
|
||
alt="Experiment setup in PostHog"
|
||
classes="rounded"
|
||
/>
|
||
|
||
Once created, set the primary metric to a trend of `pageview` and then click **Launch**.
|
||
|
||
## 4. Implement the A/B test code
|
||
|
||
To implement the A/B test, we:
|
||
|
||
1. Fetch the `my-cool-experiment` flag using [`PostHog::getFeatureFlag()`](/docs/libraries/php#feature-flags).
|
||
2. Update the paragraph text based on whether the user is in the `control` or `test` variant of the experiment.
|
||
|
||
```php file=index.php
|
||
<?php
|
||
require_once __DIR__ . '/vendor/autoload.php';
|
||
use PostHog\PostHog;
|
||
|
||
PostHog::init(
|
||
'<ph_project_api_key>',
|
||
['host' => '<ph_client_api_host>']
|
||
);
|
||
|
||
$paragraphText = 'Placeholder text';
|
||
$distinctId = 'placeholder-user-id';
|
||
|
||
// fetch the feature flag
|
||
$enabledVariant = PostHog::getFeatureFlag(
|
||
'my-cool-experiment',
|
||
$distinctId
|
||
);
|
||
if ($enabledVariant === "control") {
|
||
$paragraphText = "Control variant!";
|
||
} else if ($enabledVariant === "test") {
|
||
$paragraphText = "Test variant!";
|
||
}
|
||
|
||
// rest of your code
|
||
```
|
||
|
||
When you restart your app and refresh the page, you should see the text updated to either `Control variant!` or `Test variant!`.
|
||
|
||
> **💡 Setting the correct `distinctId`:**
|
||
>
|
||
> You may notice that we set `distinctId = 'placeholder-user-id'` in our flag call above. In production apps, to ensure you fetch the correct flag value for your user, `distinctId` should be set to their unique ID.
|
||
>
|
||
> For logged-in users, you typically use their email or user ID as their `distinctId`. For logged-out users, assuming they made their request from a browser, you can use values from their request cookies. See an example of this in our [Nuxt feature flags tutorial](/tutorials/nuxt-feature-flags#setting-the-correct-distinctid).
|
||
|
||
## 5. Include the feature flag when capturing your event
|
||
|
||
To ensure our goal metric is correctly calculated for each experiment variant, we need to include our feature flag information when capturing our `$pageview` event.
|
||
|
||
To do this, we add the [`$feature/my-cool-experiment`](/docs/libraries/php#step-2-include-feature-flag-information-when-capturing-events) key to our event properties:
|
||
|
||
```php file=index.php
|
||
<?php
|
||
|
||
// rest of your code
|
||
|
||
PostHog::capture([
|
||
'distinctId' => $distinctId,
|
||
'event' => '$pageview',
|
||
'properties' => [
|
||
'$feature/my-cool-experiment' => $enabledVariant
|
||
]
|
||
]);
|
||
|
||
// rest of your code
|
||
```
|
||
|
||
Now PostHog is able to calculate our goal metric for our experiment results:
|
||
|
||
<ProductScreenshot
|
||
imageLight={ResultsLight}
|
||
imageDark={ResultsDark}
|
||
alt="Experiment results in PostHog"
|
||
classes="rounded"
|
||
/>
|
||
|
||
## Further reading
|
||
|
||
- [A software engineer's guide to A/B testing](/product-engineers/ab-testing-guide-for-engineers)
|
||
- [How to set up feature flags in PHP](/tutorials/php-feature-flags)
|
||
- [How to set up analytics in PHP](/tutorials/php-analytics)
|
||
|
||
<NewsletterForm /> |